Woodcarving drawings. Wooden architraves on the windows are carved picture templates. Tool Requirements
Interested in wood carving for beginners, as a rule, people who do not have an art education. For them, this art is a hobby. Due to the fact that the knowledge of most of these carvers is scattered, we will try to streamline them. There is nothing difficult in wood carving itself. In Russia, this type of creativity has always been the main one. Even in the processing of stone, at first they used techniques that had long been accustomed to.
Drawing a pattern on a wooden blank
Today, this art form is of genuine interest, despite the fact that many of the skills are already being lost.
Generally speaking, wood carving can be attributed to plastic art. Traditionally, relief and are distinguished. A novice carver should first master the techniques of creating a relief.
This technique has several thread options:

The list doesn't end there. There is still a lot left behind. From the names you can understand how this or that technique of performance differs. Classification is often complicated by the fact that our country is large. In different regions, the names of the same technique may differ. However, the essence does not change, so we outline the general methods of work.
All novice carvers get acquainted with geometric carving. She is simple but beautiful. This type of thread is divided into three types:
- contour;
- trihedral-notched;
- nail or staple.
For execution you will need:
- linden board;
- joint knife;
- Ruler and pencil.
Drawings in the form of a geometric pattern are applied to the board. The carver can come up with his own or copy what he likes. You do not need to immediately take on complex elements if there are no skills and the hand is not strong enough.
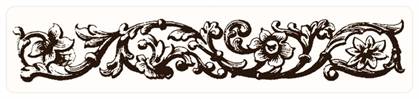
 Several ornaments for woodcarving
 The board must be smooth. Such a surface is achieved by planing. Under no circumstances should the surface be sanded with sandpaper. If abrasive particles remain in the fibers, they will not make the thread clean and neat. In addition, the cutting edge of the knife will dull faster.
For beginner carvers, it is recommended to choose hardwood for making geometric ornaments.
They allow you to draw straight lines with a knife. Creating straight lines on softwood boards is much more difficult. So, the tip of the knife cuts into the surface vertically. Depth - 1.5-2 mm. Then the entire line is cut, the knife is pulled towards us. In this case, the blade is tilted at an angle of 40°. Movements should be smooth. Note that you need to start carving the line and finish with the tip of the knife. 
Having made one line or notch, we make the next one. Only now the slope of the blade should be in the opposite direction. The chips will separate, and a geometric recess will appear on the board. If the edges are sharp and the surface is shiny, then everything was done correctly. Gradually cut out the entire element, and then the entire ornament.
Read also
Hand carved wood furniture
It must be remembered that the knife goes easier along the fibers. When cutting through the transverse fibers, more effort has to be applied. The hand can slip, and here you need to know the rules:
- work safety;
- organization of the working space;
- instrument preparation.
Workplace of the cutter
Work with sharp tools should be carried out behind a workbench that meets all the requirements for stability and strength. If it is not possible to make such a workbench, you can limit yourself to a countertop. It can be of any size, but the height should not be higher than the level of the carver's belt.
The countertop should always be smooth and clean. Often during work, the knife slips and hits the table. Chips form and need to be removed. Professionals always monitor the condition of the surface of the workbench. They do not recommend hammering nails, chopping with an axe, or throwing a sharp tool onto a workbench, as these can damage the countertop. The board on which the ornament is cut out is carefully fixed with clamps. Work on your knees, on an unstable table or stool should be excluded.
 An example of an equipped workplace for a cutter
 The woodcarving work table should be well lit. You can install it near the window. However, there is little daylight.
If there is only one light source, dull dark shadows appear that prevent the carving from being clean. Therefore, 2-3 more lamps are installed above the table.
They should illuminate the work from different angles, especially if it is dark outside. Lamps should be installed above the carver's eyes. During work, the eyes are stressed. This is noticed even by experienced craftsmen. A novice carver gets tired faster, and high-quality lighting makes working conditions comfortable and safe.
Tool Requirements
Contemporary open wide opportunities for artists. In wood processing, they are used with success. But we will consider a tool for manual work.
 A selection of chisels for woodcarving
 After all, getting the skill to work with such a tool is more important and more difficult.
In the arsenal of the master is always:
- saw;
- hand drill or brace;
- plane;
- chisels are semicircular and flat;
- knives of different sizes;
- small axe.
Many manufacturers have already taken care of the carvers and create a variety of sets. It is impossible to unequivocally assess their quality and usefulness. There are disputes about this. We only note that not a single professional master has such a set. All tools are purchased separately and finished by hand.
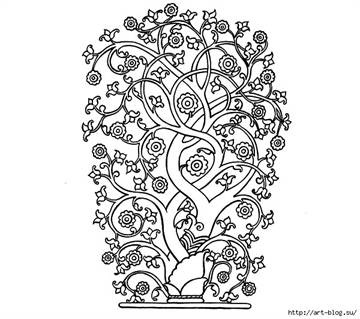
Wood carving - very ancient art. has been and remains the most affordable and attractive way to decorate your home and life. The simplest and symbols eventually turned into the most beautiful ornaments, striking in their elegance and extraordinary living warmth.
A selection of carved ornaments for woodcarving
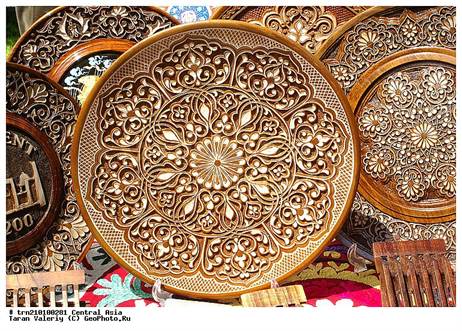
Carved ornaments have been used since ancient times to decorate wooden products. The ornament is a pattern characterized by a rhythmic arrangement of details made in the form of various pictorial elements.
There is a wide variety of ornaments: geometric and floral patterns, images of animals, humans and birds. Often, complex carving elements are simplified and stylized into parts that are more accessible to visual perception and manufacturing.
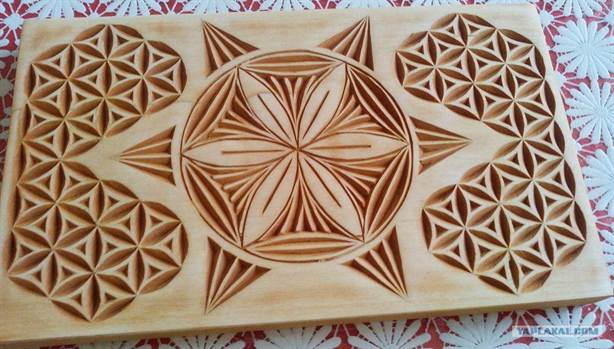
Geometric ornament patterns consist of simple details, the combination of which can sometimes create fantasy pictures of amazing beauty. and compositions are usually presented in the form of ornamental stripes, rosettes, stars or borders. Individual elements can also be used on their own: 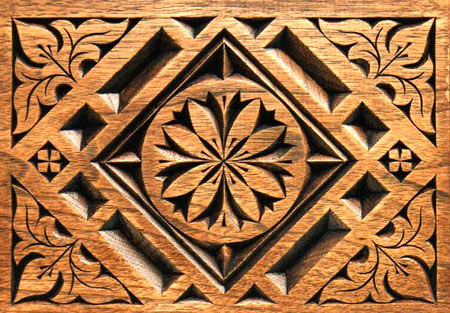
- Dot. Rarely used as an independent element, but when repeated, it acquires a decorative effect.
- Lines. A frequently used element, most often used to distinguish between individual motifs.
- Broken line. Zigzag is a symbolic sign of water.
- Square and rhombus. Often serves to limit the space filled with motifs.
- Hexagons and octagons. Traditional element in oriental motifs.
- Crosses. Ancient symbols of various structures.
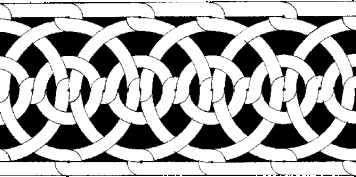
- Spirals and twisted cords. Beautiful elements with a curvilinear geometric structure.
- A circle. It contains a pattern or is an independent detail of the composition.
Geometric ornament is used in various types woodcarving, but especially in geometric and contour techniques.
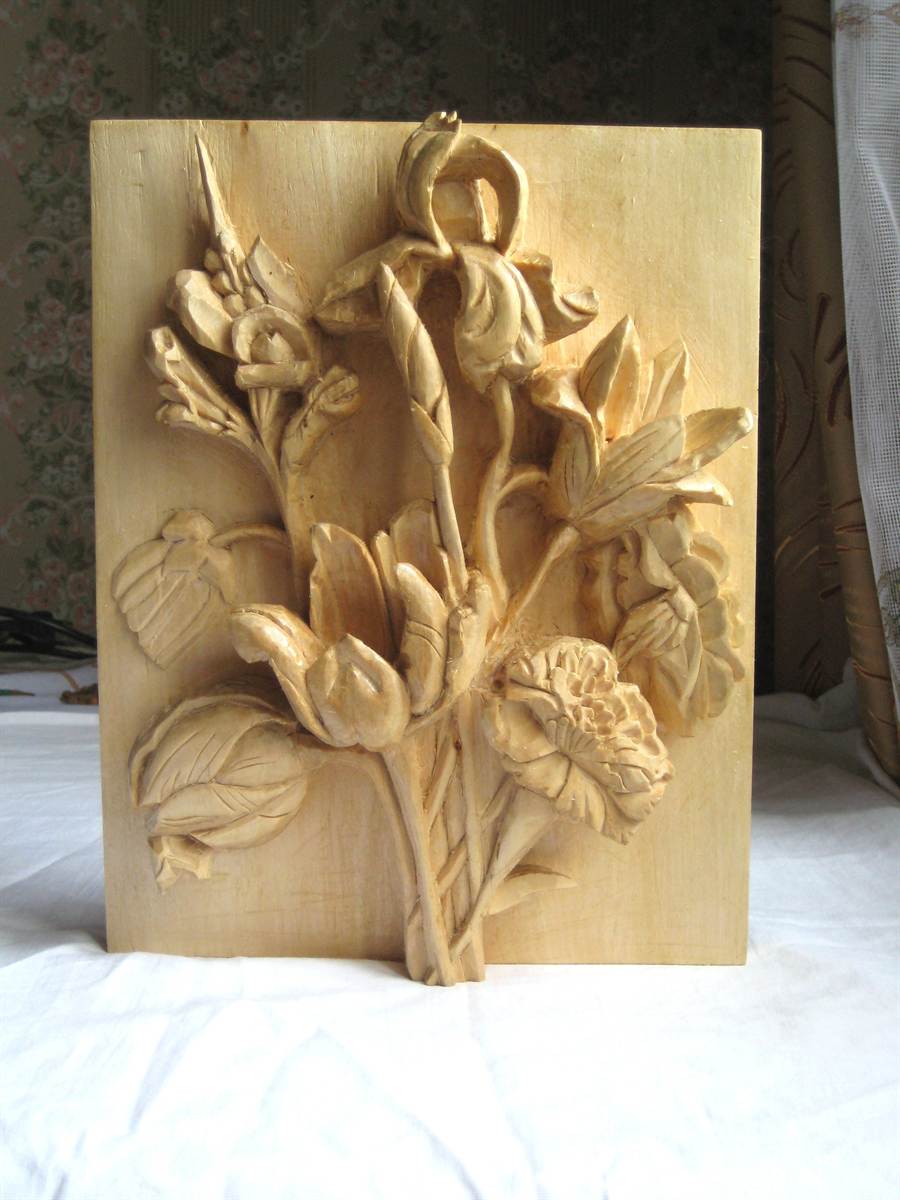
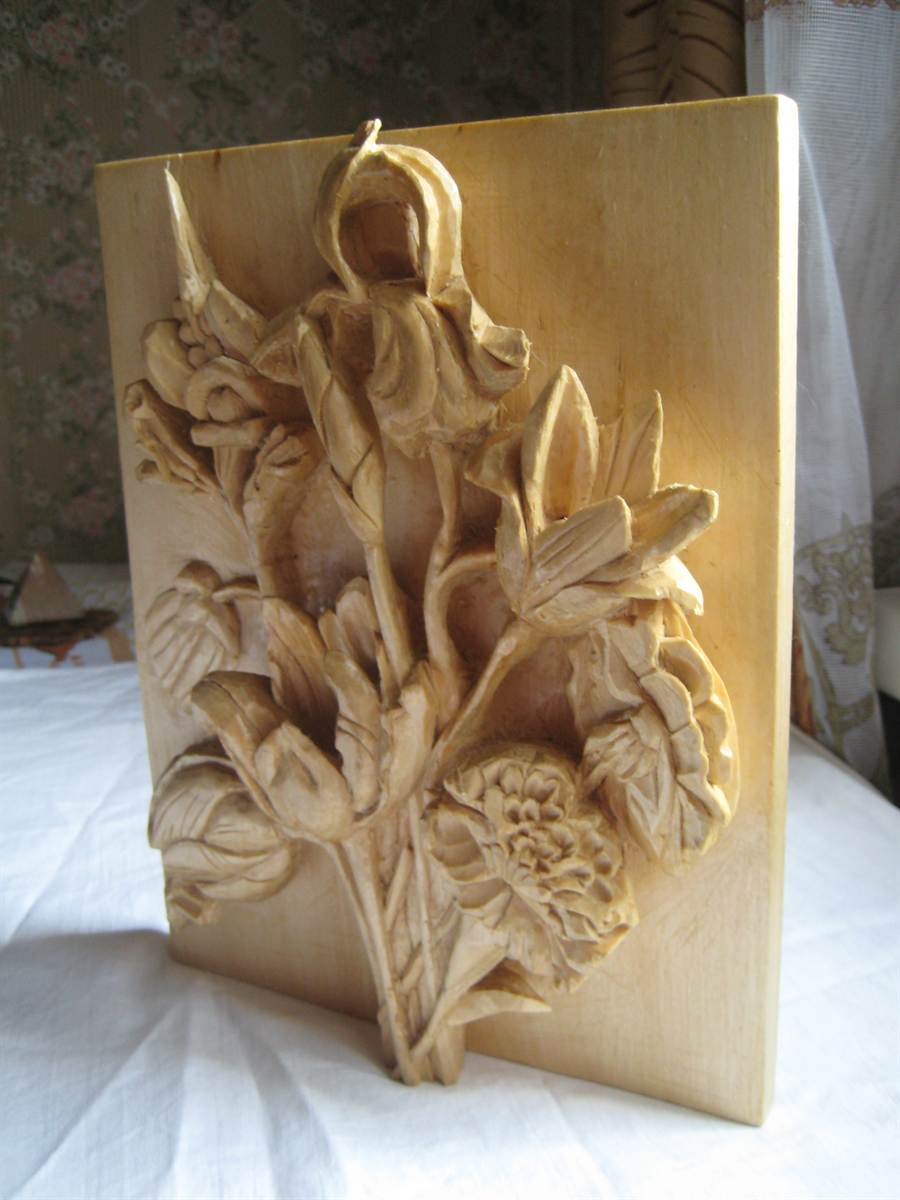
Floral ornaments
A vegetative or leafy pattern can be made in the form of a border or a strip of an ornament with repeating elements, or it can be a separate composition depicting trees, fruit-bearing plants, flowers, and so on. Representatives of the flora are either depicted in a very naturalistic way, or stylized and simplified.
Image of a man in an ornament
A schematic or realistic depiction of a person is often used in woodcarving. For example, a human face is used to decorate such decorative elements as a mascaron. A person is often present in ornaments with plant or animal motifs.
Complex ornaments
There are also carved elements bearing both a decorative and a symbolic load:
- inscriptions, hieroglyphs, Arabic script, etc.;
- heraldry - emblems, coats of arms of family and different countries;
- symbolic motifs - they are very diverse, for example, a cross, a yin-yang sign, a lotus, solar signs, and so on.
The main forms of carved ornament
Depending on the nature of the composition, location and shape, the following types of ornaments are distinguished:
 Carved ornaments for woodcarving
 - Ribbon ornament and border. A carved detail that surrounds or runs along the edge of a product.
- Garland. Wavy pattern with floral motifs.
- Socket. A separate symmetrical view of the ornament of the correct form: circle, polygon, oval.
- Palmette. It is a fan-shaped carved decor.
- Arabesque. It makes a complex ornate pattern of geometric or floral ornaments.
- Wreath. Carving element with a floral motif.
- Network. A pattern with interlacing elements - stems, ribbons, stripes, etc.
- Panel. A pattern enclosed in a carved frame or ribbon.
- Openwork ornament. It is performed in the technique of sawn carving, the peculiarity of which is the creation of a through background of the pattern.
Wood carving is an ancient art form. Its high popularity to this day explains the availability of the material, the beauty of the result. Primitive drawings, which can be found on the works of our ancestors, eventually turned into elegant patterns and ornaments. Thanks to the possibilities of the Internet, finding sketches for woodcarving is not particularly difficult.
What is an ornament
Since ancient times, various ornaments have been used to decorate wood products. The ornament is a special rhythmically arranged pattern made of various pictorial elements.

There are several basic, basic varieties of ornament. Let's take a closer look at some types.
geometric ornament
A geometric ornament, as a rule, consists of many simple shapes, the combination of which creates an amazing fantasy image.
Separate elements of a geometric ornament can be used independently:
- dot (in aggregate acquires a decorative effect);
- lines (used as delimiters of individual plots on the product);
- broken lines (carry a sacred meaning, for example, a zigzag is a symbol of water);
- squares and rhombuses (act as frames for plots);
- polygons (traditional patterns of oriental motifs);
- crosses (in ancient times - symbols of various structures);
- spirals, screws;
- circles.


The geometric ornament will receive the greatest distribution in geometric and contour carving.
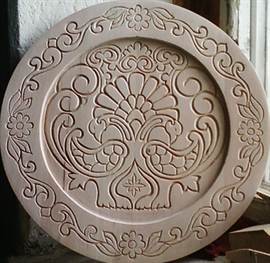
Trees and flowers
They border the main ornament of the composition, or are independent ornaments. Trees, flowers, fruit-bearing plants are depicted. It is one of the most favorite ornaments of different nations.
The most common forms are lotus, ivy, grapes, oak.

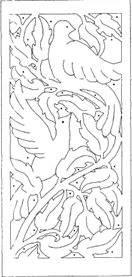
Wild animals
As the name implies, zoomorphic ornament is based on the repetition of the image of different animals. Most often, their appearance is greatly simplified. Often animals are associated with mythology.

It is used in combination with floral and geometric ornaments.

It is found in any type of carving (from flat-relief to sculptural).
Picture of a man
As a rule, a person in woodcarving is depicted schematically, coupled with floral and animal ornaments.

Complex ornaments
The most diverse elements that have a decorative function (inscriptions, hieroglyphs, Arabic script, heraldry, symbols).


Depending on the location and shape of the ornament, the following varieties are distinguished:
- border;
- garland (wavy ornament);
- rosette (separate figure of the ornament);
- palmette (fan-shaped ornament);
- arabesque (complex, ornate ornament);
- wreath;
- panel.

Stages in preparation
Before you cut out the ornament you like, you need to find its sketch. After that, you will need to cut out the templates.

Next, transfer it to the workpiece using carbon paper (tracing paper) and a simple pencil. And only then will it be time to cut out the ornament (with a knife, jigsaw, milling cutter or other suitable tools).
Beginners should not take on complex, ornate ornaments. Good for beginners contour thread, artistic motives.
The template must be suitable for specific type threads. For flat-relief and geometric carvings, there are some templates, for slotted - others.
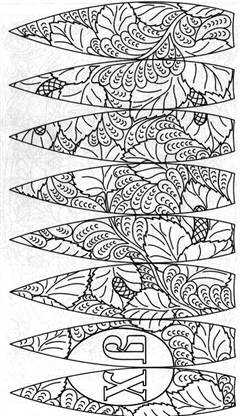
Here are some simple sketches (photos and drawings):


The most ancient art is woodcarving. It can decorate the house and interior elements. Many different simple patterns have become excellent, which attract with their elegance and precision.
Woodcarving ornaments have been used as a decor for a long time. An ornament is a pattern that has combinations various forms: geometric, vegetable, animal, bird, human, etc. The elements that make it up can be repeated or alternated. More complex components can be simplified for a better perception of detail.
Carved ornaments in the traditions of Russian patterning are familiar to many of us - carved shutters and architraves, valances, friezes and balusters, decorative balconies - the Russian hut has been famous for these decorations since ancient times. And until now, many owners of country houses prefer magic carving to practical plastic. True, subtle work is now being done with the help of new technologies.
The geometric ornament is characterized by various simple patterns., when combined, you can get amazing drawings that fascinate with their beauty. Most often presented as decorations are stripes, stars, rosettes, etc. Other wooden elements also make sense and give a great look. Among other geometric patterns, there are:
- A dot is an element that is used separately, but is reused as a decor.
- The line is a frequently used pattern, intended mainly for separation.
- The zigzag or broken line symbolizes water.
- A rhombus or square delimits a space filled with patterns.
- Polygons (hexagons, octagons, etc.) are often used in oriental woodcarving.
- Crosses mean the creation, construction of something, etc.
- Twisted or spiral, or other curved elements.
- The circle is filled with a pattern and is responsible for a separate composition.
Description of floral ornaments
Performed in different varieties or repeated separately. They can be an excellent composition, on which there can be drawings of a tree, a fruit plant, a flower, etc. Floristry is depicted naturally or in a simplified or stylized form. It is considered the most popular after the type of geometric ornament. Since ancient times, the most commonly used were wooden grapes, oaks, laurels, lotuses, ivy, etc.
Gallery: woodcarving (25 photos)


Properties of an animal (zoomorphological) ornament
 This carving shows drawings of various animals, which may be fictional as well as real. They are often stylized. These are very old drawings. Among the patterns there are not only whole wooden elements, but also individual parts of the body of animals (heads, wings, paws, etc.). Quite often used in combination with different types of ornaments. Can be used for various threads.
Ornament with the image of a man
In wood carving, a wooden man can be depicted schematically or more realistically. Use it for decorative interior details. It goes well with different types of patterns.
Among all the ornaments of woodcarving, one can distinguish such wooden decorative or symbolic image types, for example:
- Hieroglyphs, inscriptions, etc.
- Emblems, emblems, etc. (heraldry).
- Miscellaneous symbols (yin-yang, lotus, cross, etc.)
The main forms of different patterns
It all depends on which one is used. There are the following forms:
- A ribbon shape or border that runs along the edge or frames the product.
- Garland - wavy shape (mainly used with floral ornaments).
- Rosette - an independent form in the form of a flower, a polygon, etc.
- Palmette - fan shape with decoration.
- Arabette is a complex patterned element made up of geometric, plant shapes.
- The wreath is used in the plant form of ornaments.
- The braid is made with interlacing components (strips, ribbons, stems, etc.).
- An openwork ornament requires the implementation of a sawn carving technique (making a through background image).
Sketches (album) for the formation of patterns
 Initially, before starting wood carving, you need to make a sketch on paper (you can in your workbook) of the same size. You can do this on a printer or copier (reduce, enlarge, etc.). You can also draw freehand using cells for linear scaling. On a tree, this carved ornament is duplicated using plain carbon paper. For a through thread, you can make a simple template by cutting it out with scissors so that you can apply it further and trace it with a pencil on the workpiece. You can buy special patterns or find images on the Internet; the Slavic pattern is very beautiful and ancient.
In pursuit of extravagance in design solutions, we sometimes go too far. Wood carving with a jigsaw - real example how you can surround yourself with beauty with the help of simple little things. Today, such decor is both an ancient craft and an actual trend in the interior. Carving carries artistic value, and therefore carved objects will only gain in price over time - the style will return again and again.
Volumetric wooden patterns will decorate furniture, become the basis for a wall panel, trim, headboard or screen. The editors of the publication offer to master the technique of carving in a few clicks.
Do-it-yourself wood carving with a jigsaw: where to start?
Tools and workplace preparation
Like any other occupation, woodcarving begins with the preparation of the workplace:
- choose a comfortable chair and a stable table;
- give Special attention good lighting. You should place the table so that the light falls on the face, and for artificial lighting it is better to install a table lamp no more than 20 cm high at a comfortable distance for the eyes;
- everything you need should be at hand - a sketch, a board, tools.
To complete the ornament you will need:
- jigsaw (manual or electric);
- special machine for volumetric threading;
- plywood or wooden board;
- a set of files;
- awl and chisel;
- drill;
- glue for gluing individual parts;
- tassel;
- stain and varnish.
Good tools can be found at Proxxon, Arbortech, Ryobi, Pfeil, Dremel, Kirjes, Foredom.
Photo 4 - An alternative to the classic version - a picture - above the bedTree selection
Photo 5 - Carved decor elements in a modern kitchenIMPORTANT! The most practical types of wood are linden, birch, alder, aspen. They have the necessary properties of hardness and moisture content (8 ± 2%), which reduce the risk of product cracking.
It is better to prepare wood in advance, it is very important to dry it well beforehand and treat the surface with sandpaper. It should be uniform, smooth, not have knots. Conifers are practically not used. The size of the board depends on the size of the future product, but the thickness should be at least 6-8 mm and not more than 15-20 mm.
Photo 6 - Ethno in the interiorSketches, templates and stencils
Photo 7 - Wooden products are good for their versatility: wood is suitable for both an ascetic interior and an ornate modernist stylePreparing a sketch is the first step in creating a wooden decor. A sketch is usually called a contour drawing of a future product.
Photo 8 - Appropriate tree in the design of the roomA stencil is a specialized template that displays volumetric ornaments and patterns. Samples with an image for carving will help with the markup. Stencils made of cardboard, three-layer plywood, PVC sheet can be used repeatedly, and for convenience it is better to sign or number them.
Photo 9 - Wood lace in the interior of the bedroomFrom the halves of one or more templates, ready-made combined ornaments are often created for the design of long interior elements.
Photo 10 - The color and texture of the product depends on the choice of breedHow to make the right pattern?
- select the appropriate sketch;
- using a compass and a ruler, we transfer the ornament to cardboard or paper.
IMPORTANT! Check if all elements of the picture are transferred accurately. Each element, pattern or ornament requires a separate template.
Woodcarving with a jigsaw is carried out according to strict technology. In addition to the standard manual, they often use an electric jigsaw, special tables for volumetric carving, chisels, cutters, carpentry tubes and clamps, drills and grinders, spoon cutters.
Photo 12 - Vintage carved door in the design of the bedroomwood carving technology
Photo 13 - Carved element made with a jigsaw and chisel- using an ordinary black carbon paper and pencil, the drawing is carefully transferred to the board. For convenience, the edges of the sketch can be fixed with pushpins;
- insert the file into the jigsaw. We adjust the tension of the file;
IMPORTANT! Remember that too much or too little tension can cause the blade to break during use.
- we cut out the contour of the product with a jigsaw along the previously outlined line. The jigsaw should move up and down without distortion, with light pressure so as not to damage the product and the tool itself. The position of the saw blade during operation must be vertical. With curly carving, the product should be rotated, and not the jigsaw itself;
- if internal details are conceived in the product, additional holes must be made. At this stage of work, you will need an awl and a jigsaw. In the middle of the part to be removed, you need to pierce a hole with an awl;
- loosening the top clamp of the jigsaw, insert the file into the punctured hole;
- we cut out the removed part of the picture;
- the product can be varnished, sanded or decorated.
IMPORTANT! In house carving, a special place is occupied by the decor of platbands - on windows, cornices, doors, they will ideally fit into the interior of a summer house or gazebo.
Wood carving: country style window trims
Photo 15 - Design project Doorway to the Ozarks by Matthew MeersWoodcarving is more often chosen for the decoration of private houses. house carving used in exterior design - platbands on doors or windows. There is a possible combination different types threads - from slotted to embossed.
Photo 16 - Wooden mural by Matthew Meers (A 26′ x 6 1/2′)Platbands close the gap between the window frame and the opening. They protect the window from dust, precipitation, drafts and even external noise; can change the parameters of the house - make it visually higher or wider.
Photo 17 - Carving in minimalismIMPORTANT! The platbands on the windows must be designed in the same style, and the material must be resistant to precipitation. Linden or oak is best suited.
When making platbands, you can not do without sketches. Their long design requires careful handling, as it consists of many small parts. All these trace elements must be identified and taken into account when carving - it is better to mark in advance the places for the holes inside the pattern. In complex ornaments, they begin to cut out from the internal patterns, and then move on to the external.
Photo 18 - Carved elements in an eclectic interiorAnother way to apply a pattern to the workpiece is copying. You can also transfer the drawing using carbon paper. The sketch is fixed with pushpins. With a pencil, you need to circle the outline, which is copied onto plywood.
Photo 19 - Clamp for fixing a wooden product. In the background: a set of chisels for sampling small depressions in wood and contour carvingThe stencil for platbands must be made of cardboard. It differs from standard stencils in that its dimensions are made immediately in full size. Ready template attached to the board, the outline is outlined in pencil. To create a holistic image of the door, carved rosettes are often used to help join the trim.
Photo 20 - Fragment of a mirror frame. By the same principle, window or door platbands are cut out.Decorative architraves are suitable for all sizes of doors, even the most non-standard ones. You can find a wooden frame in the catalogs of manufacturers Saloy, Fenster Baum, DoorWood.
Photo 21 - Carved window frame Photo 22 - Details with a chiselDisadvantages of carved architraves: Photo 24 - If the vases are used for their intended purpose, they must be soaked with drying oil or sunflower oil Photo 27 - Classic ornament
3D milling has a number of advantages:
- image transmission accuracy;
- high production speed;
- lower cost compared to manual carving;
- the ability to create complex three-dimensional structures.
$ Machine 3D: price for popular models
- Engraving and milling machine Esfero 3D for 2D / 3D processing and cutting wood, plastic, plexiglass and even non-ferrous metal. Price: 490,000 rubles;
- the machine milling and copying for a volume carving of MPWOOD tm. Price: 101 930 rubles.
Master class: sawing with a jigsaw
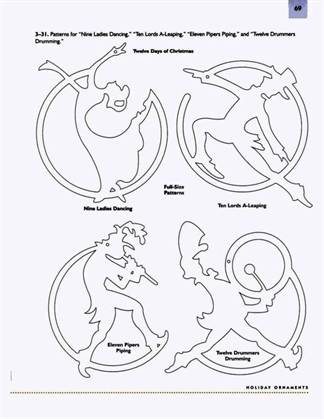
Sketches for woodcarving: