How to remove the skin from the fox and its primary processing. Dressing fox skins How to process a fox skin with your own hands
Dressing skins is a procedure that even beginners can do. Using improvised means and a simple tool, you can independently prepare the material for sewing a fur product, which will significantly reduce its cost.
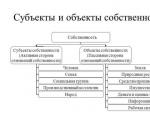
Dressing animal skins - the oldest human craft
First, the skins are distributed into batches based on the following criteria:
- thickness and size;
- type of animal;
- the sex of the individual.
Skins after conservation are stored in an unheated, dry, well-ventilated area. At temperatures below 6 ° C, the raw material is not subject to attacks by pests - moths, beetles, cockroaches. But if such conditions cannot be provided, the material is treated with an agent against these pests.

a - kozheed beetle; b - its larva
On the preparatory stage the skin is examined. If there is contamination, the fur is wiped with textiles soaked in soapy water (use laundry soap). Areas where the pile is tangled are combed with a brush.
Attention! If the skin is processed incorrectly, then its shelf life is reduced, and the quality of the material is reduced. Therefore, you must strictly follow all the recommendations.
Step 2. Primary skinning
This is one of the most important ritual processes. After being removed from the animal, the skin is usually greasy, which is why the mezra subsequently deteriorates. If not treated, the fat oxidizes, decomposes, the decay products enter the skin and form fatty burns. From this, the properties of raw materials change, dressing becomes more complicated, and damage occurs.
Degreasing is carried out within a day after skinning. First, sunsets, gore, pollution are removed. The blade of the tool is held at an acute angle to the bracket. This reduces the chance of cutting the skin and hair roots. For beginners, it is better to use spoons and blunt knives. Experienced craftsmen degrease the skins when shooting.
If it was not possible to clean the skin from all the tissues of the animal, the remains are cut with curved scissors. The same tool is used to clean the paw area.

The flowing fat is sprinkled with sawdust of deciduous trees. Hands and accessories are constantly wiped with a dry, clean rag.
Step 3. Soaking, or soaking
Soaking is the first technological operation in the dressing process. The purpose of this stage of processing is to remove blood from the skin, the substances used for preservation, and return it to a state close to a pair.
Attention! All stages use soft or medium hard water. High hardness leads to the formation of lime soap, which makes processing difficult. Hardness is reduced by boiling with alkali or ammonia (10 g / l) is added.

The required volume of water is calculated in accordance with the LCD (liquid coefficient). So, if LCD = 5, then this means that for one skin you need to take water 5 times more than its weight. When there is no information about this indicator, then the volume of liquid should be such that the skins float freely in it. For soaking take plastic, wooden, glassware. The metal is not used because of the likelihood of an oxidation reaction.
For soaking skins preserved by the dry-salted and fresh-dry method, you can use the following solution:
- water - 10 l;
- phenol - 20 g;
- table salt - 500 g;
- zinc chloride - 30 g;
- formalin - 10 ml;
- Surfactants (shampoos, foaming agents) - 15 ml;
- borax crystal - 300 g.
The last two components are optional, but their use is the best result, especially when working with spoiled raw materials. So, zinc prevents hair loss. If there is no formalin, use furacilin, norsulfazol tablets (10 pieces per 10 liters). To curb the growth of bacteria, special preparations such as BiocideMLS are also used. Surfactants are optional, but especially recommended for sheepskin, marmot, fox and other hides that have a higher fat content. Washing powders are used less and less as surfactants. These funds provoke the appearance of rigidity. It is better to use non-ionic products based on ethylene oxide - for example, Wetter HAC.

The optimum solution temperature is about 20°C. The skins are immersed in the soaking liquid so that they are at the bottom, and a layer of solution of 4–5 cm covers them from above.
Carelessly cleaned skins, materials with keratinization of the mezra do not soak well. Then enhancers are added to the solutions. Alkaline products are popular - ammonia (500 ml / 10 l of water), soda ash (100 g / 10 l of water).
Attention! If the hair is weak, then alkalis can cause even more hair loss. Then preference is given to organic acids (10 ml / 10 l of water).
The soak lasts from 2 to 24 hours. Sometimes it becomes necessary to soak the material for 4 days. The fastest soak skins, preserved dry-salted and wet-salted ways. In the latter case, the material is simply washed in warm water.
Signs of the end of the soak:
- uniform soaking of the core;
- softness and elasticity of cartilage;
- hair strength.
Attention! Soaking should be carried out as soon as possible in order to prevent the development of microorganisms that can damage the raw fur.
The best result is obtained if the soak is carried out in two steps. After draining the remaining water from the skin, they proceed to next step- mezdrenie.
Step 4. Secondary skinning
This is a process in which the inner layers of the skin, the remains of meat, fat are removed from the skin, the dermis is loosened for a more complete effect of the chemicals used in the remaining stages. If the skin is thick, cut off the core to get the same thickness over the entire surface. Carry out work carefully so as not to damage the skin and not expose the hair root.

For this treatment, the skin is placed with the fur down on a convex surface. The main tool is a knife or scraper with a blade placed on the end. Cleanse the skin from the tail to the head, along the line of the spine, then from the spine to the sides.
In order not to stain the fur with fat, sprinkle the skin sawdust or calcium sulfate (burnt gypsum). The operation is completed if it was possible to achieve elasticity and softness of the skin, its extensibility in all directions. Next is the breakdown. To do this, use a cutting tool with blunt blades. This helps to get rid of the remnants of fat in the thickness of the skin and soften the core.
Step 5. Secondary degreasing
The skins are subjected to washing in water at a temperature of about 35°C, strongly greasy - at 40°C, using washing paste "News", detergents for washing dishes such as Fairy and others.
Attention! Do not increase the washing temperature, as overheating may cause hair loss.
Washing time is about 40 minutes. Strongly greasy skins are washed 2-3 times. It is allowed, and even recommended, the use of activator-type washing machines or multifunctional electric launches.

From the washed skins, the remaining moisture is squeezed out by drying in a centrifuge or placed on goats so that the liquid is glass. If the core is thick, the skins are beaten off on both sides. It also improves the appearance of the fur.

Step 6. Pickling
The next stage is processing with pickles, or saline solutions with the addition of inorganic (sulfuric) and organic (lactic, formic, acetic) acids. Inorganic products act more aggressively on the material, this has a bad effect on its subsequent service life. Organic acids work more gently, but can also harm the material by changing its color. Therefore, in order to reduce harm, at the end of the procedure, the action of acids is neutralized.
Pickel can be prepared on the basis of acetic acid:
- water - 1000 ml;
- acetic essence (70%) - 20-50 ml or concentrated acetic acid 15-35 ml;
- table salt - 50 g.
For this purpose, sour white wine (1 part) diluted with water (3 parts) is also used.

Attention! Acetic acid is a universal preparation for all types of fur.
During the pickling process, the skins are constantly stirred to prevent them from twisting, especially if the tails are preserved. The duration of the procedure depends on the density and thickness of the skin.
Table 1. The duration of the pickling process depending on the type of skins
| skin type | Duration, hour |
|---|---|
Thin, loose (rabbit, gopher) | 5-10 |
Medium thickness (ferrets, raccoon dogs, roe deer, young deer, etc.) | 12-30 |
Thick (wolf, elk, wild boar) | 96 |


The readiness of the skin is checked by folding the corner four times and squeezing the folds tightly. After the fingers are unclenched, white seams should remain on the skin. In this case, the material is pulled out of the mixture, carefully squeezed out, and left for 12 hours at a temperature of about 20°C.
Neutralize the action of acids with an alkaline solution. It is made from baking soda (100 g / 10 l of water). Also use hyposulfite (500 g / 10 l of water) with the addition of 300 g of salt. The skins are soaked in the neutralizer for 2 hours. Then they are allowed to ripen for another 12 hours. To do this, the skins are turned inside out with fur and stacked under a press of 5–7 kg.
Step 7. Fermentation
This method makes the mezdra very soft. It is often used when working with lambskin, sheepskin, squirrel, fox skins.

In this case, fermented sourdough from flour and bran is used for soaking. The dipping and spreading method of processing is used.
For perch fermentation, kvass is prepared:
- boiling water - 1000 ml;
- coarse oat flour - 200 g;
- salt - 1 tbsp. a spoon;
- some yeast.
When the solution has cooled to room temperature, the skins are immersed in it, and the container is covered with a lid. The temperature of kvass during the entire soaking period should be at the level of 30°C. Stir the skins every 2-3 hours. A day later, the material is checked for readiness.
However, this method is very time consuming, since subsequently it is quite difficult to clean the fur and skin from leavened dough. Spread fermentation is more convenient. It involves kneading the dough with more flour and yeast to the density of sour cream, which is left for fermentation. The mixture is applied with a wooden spatula to the mezra with a layer of 1 cm and the skins are folded with the treated side inward. For best results, fermented dough is changed every 24 hours.
Attention! Improper fermentation leads to damage to the fur raw material. Therefore, beginners can resort to this method only if there are no chemical reagents.
Beginners may encounter difficulties such as:
- the need for careful control over the process;
- the complexity of the procedure;
- instability of the core.

Step 8. Tanning
This is the penultimate stage, the purpose of which is to strengthen the protein structure of the skin, to make it resistant to moisture. For this, chromium sulfate salt is used (1.5 g / l of water, t ° - 40 ° C). The skins are kept in the solution for 6 hours, stirring occasionally. Then they are taken out and dried. Instead of chromium oxide, chromium and aluminum alum are used. This method of tanning is called chrome.
Vegetable tanning is also common - instead of chemical substances take alder and willow branches, wild rosemary, nettle leaves and oak bark. For 10 liters of water you will need:
- vegetable raw materials - 2.5 kg;
- salt - 600 g.
Plants are placed in cold water, salt is added, allowed to boil, kept on fire for 30 minutes. Then bring the volume to the original boiled water, cool. The skins are kept in tannin for 6 hours.

Step 9 Fattening
Zhirovka provides softness, facilitates the work of the cutter and tailor. The fur then becomes shiny, smooth. At home, the skin is impregnated with any industrial or domestic fat composition. For this purpose, fish oil and laundry soap are used, 50 g of each component, which are diluted in warm water (300 ml). Fat is produced from the inside of the skin. The solution is generously applied with a brush to the core.
After processing, the skins are stacked and allowed to soak for 2 hours. Drying follows. In summer, processed materials are taken out under a canopy, in winter - in a warm room at a temperature of 30 ° C. Drying time - days. The entire period of the skin is crushed, turned inside out, again wrinkled.

When the material is dry, the skin is polished with sandpaper, the fur is combed. The thick core is trimmed with a metal brush. Ideally, a skinning machine or miniflasher is used.
Step 10 Finishing
A sign of a well-dressed skin is shiny, crumbly fur, soft and plastic skin underneath. The fur is polished with sawdust of deciduous trees, combed again.

Dressing - pretty profitable business. Therefore, it is useful to master it for those who are engaged in the cultivation of fur-bearing animals.

Video - Dressing skins
- really an exciting activity for the hunter. However, what to do with a dead trophy? How to dress the skin of a fox so that it can be used on the wife's collar? Unfortunately, not many hunters know how to properly dress fox skins, and as a result, an improperly dressed skin is sent to the trash, and the hunter himself has a feeling of displeasure. Still - try so hard, hunt, kill the fox, and ... throw away her skin.
Today we will tell you about how to make a fox skin at home simply, quickly and correctly.
Is it possible to make a fox skin at home
Of course, you can, just don't be afraid of complex recipes and methods of dressing. In fact, you can always find a simpler and minimally costly (both in terms of time and ingredients for dressing) method, the result of which will not disappoint you. In addition, with the help of this method of dressing the skin of a fox (even a person who has not previously been engaged in furrier business can do this), you will get the coveted collar without much difficulty.
Video on how to skin a dead fox:
In order to proceed with this method, of course, you will need a freshly mined fox skin. How to hunt it - you yourself know. So, if the fox skin is already dry - you will need to soak it first - for this, place such a skin in a container with cold and salted water overnight so that it becomes soft and pliable. And, in the morning - it will be possible to proceed to the next stages of dressing the skin ...
1 stage dressing - skinning
After you take out the fox skin in the morning - and it is again soft and supple, you need to clean the fox skin from fat, films and meat residues with a blunt knife or some other device. To do this, use the scraping, scraping technique and carefully remove everything superfluous from the skin while trying not to damage the fox skin. The torn skin is no longer the same, and there are fewer opportunities to use it.
2 stage dressing - washing
After you have cleaned the fox skin of all excess, you need to wash the fox skin in order to clean the fur of dirt and blood. How detergent use? In principle, you can use any detergent that you have on hand (as long as it is chlorine-free). For washing, use cool water, wash the skin by hand (never in a washing machine!). You should not rub the skin with your hands - it is better to leave it for 30 minutes in this soapy water so that the dirt is soaked, and then gently rinse several times in clean water until such water becomes clear and clean.
It is not worth squeezing the fox skin with your hands - it is better to hang it so that it is glass.
3 stage dressing - pickling
After the skin has flowed around and there is a minimum amount of moisture left in it, you need to place it in the pickel solution. It is very simple to make such a pickling solution - it is enough to add 30 grams of salt and 30 grams of vinegar (70%) to 1 liter of cold water. Make sure the skin is completely covered with the solution. And, in order for it not to float up, you can put oppression on it.
4 stage dressing - drying
After the fox skin has spent the night in the pickling solution, the next morning you can take out such a skin, shake it and hang it up so that excess water drains. Drying the fox skin near heating appliances is not recommended - it is better in the sun or in a draft. Periodically turn the skin over to the other side so that it dries as evenly as possible.
In order for the fur to be good, the skin of a fur-bearing animal must be faded (faded, with a white mezra), obtained during the hunting season, properly removed, degreased and dried. it required condition obtaining quality fur.
For home dressing, you need: vinegar essence, table salt, laundry soap or better laundry detergent "News", wooden standard rules of the required sizes, hyposulfite, bark or roots of tanning plants, fish or seal oil, ammonia, brush, pumice stone, knife, glass jars with lids, a tablespoon.
Sequence and features of operations.
1 soaking.
Dry skins are immersed in a salt solution (4 tablespoons of salt without top per 1 liter of water). The temperature of the solution is room temperature, about 18-20 ° C, but not more than 25 ° C, since at high temperatures the hair can climb (“leak”). The liquid coefficient (the ratio of the weight of dry skins to the weight of the salt solution) is 1:10. The exposure time of the skins in the solution is 12 (up to 24) hours. The soaked skins must be turned inside out, squeezed out carefully by hand. If the skins are freshly removed, soaking is not performed.2 Mechanical degreasing, skinning
removal from the mezra with a blunt knife with movements from the rump (back) to the head of previously not removed pieces of fat, muscles, films. This work can be carried out on a good wooden rule or on the thigh, putting an oilcloth under the skin. If the skin is clean, the operation is excluded.
3 Degreasing and washing hair and mezdra
in solution laundry soap(foam) or washing powder "News" (other washing powders are not recommended). Dissolve the soap in warm water, as for washing the head, beat the foam, cool the solution to room temperature 18-20 ° C (no more than 25 ° C). If "News" is used, then take 5 g of powder per 1 liter (1 tablespoon per 4 liters) of water. Put the skins in the solution for 20 minutes, slightly wrinkle them with your hands (wash), turning the fur inside and out. Then rinse in clean cold water, wring out with your hand, turn inside out with fur. A small amount of hair in soapy water should not cause concern.
4 Dressing skins by pickling
Pikel: 2 full tablespoons of vinegar essence and 4 tablespoons of salt (without top) per 1 liter of water. Pickel temperature - 18-20°C (no more than 25°C!). Liquid ratio 1:10, as in soaking. The skins are immersed in a pikel with the skin outward: thin skins (hare, rabbit, juvenile muskrat) - for 3 hours, medium thickness (large fingerlings of muskrat, young sable, squirrels) - for 6 hours, normal thickness and thick (adult sable and muskrat, fox ) for 12 hours. The jar with the contents is covered with a lid so that it does not smell like vinegar. If the skins are different or there is no certainty in determining the correct thickness of the skins, it is better to underexpose them in the pickel than overexpose them. From time to time, the solution is stirred with a stick or spoon. After the pickling time has elapsed, the skins are taken out, squeezed by hand, folded in half or three times with the skin to the skin in a pile, like pancakes, and put on a bed under oppression (load). They keep under pressure half the time of pickling (thin skins - 1.5 hours, medium - 3 hours, normal and thick - 6 hours).5 Drying skins
produced at room temperature, away from heaters on the rules with the fur inside), and then their kneading. It is better to start wrinkling wet (slightly damp) and still soft skins. They are removed from the rules and crumpled slightly as they wash a handkerchief. Sip slightly up and down, not forgetting about the marginal parts (at the rump, head, paws). Again, put the skin on the rule and wrinkle as it dries. It is convenient to carry out the last operation in front of the TV: you watch the news or another program and gradually wring out all the skins. If the dry skin after wringing has become soft, fluffy, pleasant, then it is dressed and ready for subsequent operations. If the whole skin or its individual parts remain tough, then such an under-finished skin is again put on the rule with the flesh outward and the unfinished places are smeared with a brush with the same pickle in which it was dressed, or cooked fresh (1 full tablespoon of vinegar essence and 2 tablespoons of salt per 0.5 l of water). All unfinished places are impregnated with a solution: the more, the less processed they are. Dry again on the rule and wring out the skin. Those places where the skin is thick, where there are films, or where it has done worse, are rubbed with pumice stone, removing the thin top layer of the mezra, or scraped with a blunt knife from head to tail. Repeat this treatment until each skin is soft and fluffy. To consolidate the achieved quality of the fur and increase its durability, the skins dressed with a pickle and a wash are neutralized, washed again in soapy suds or "News", tanned, fattened, finally wrinkled and wiped with pumice.6 Neutralization
The skins are immersed for 1.5-2 hours in a hyposulfite solution (sold in pharmacies or photo shops): 50 g of hyposulfite (one tablespoon with top) and 30 g of salt (1 tablespoon with a little top) per 1 liter of water. The temperature of the solution is 18-20°C (no more than 25°C!).7 Rinse
skins in cold water, washed in "News" or in soapy foam (as in paragraph 3), but only faster, for 3-5 minutes, rinsed again in cold water, squeezed and pulled with the flesh outward on the rules, dried and wrinkled at room conditions (as in point 5).8 Tanning
very responsible operation. Untanned skins under the influence of moisture quickly lose strength, tear and crumble. Re-tanned skins become hard, like soles. Therefore, it is better to carry out weak tanning - by spreading the mezdra on the rule with a brush with a water extract of any one common tanning agent. To do this, a half-liter jar of crushed dry bergenia roots or oak bark (sold in pharmacies), or willow bark is poured with two cans of water, brought to a boil, boiled for 10-15 minutes, then insisted for a day. The broth is filtered through gauze. With a cold decoction of the brush, each skin is evenly moistened from the side of the mezra, then they are dried again on the rules. As the skins dry, they are wrinkled (as in paragraph 5).9 Fatty
increases the softness and elasticity of the skin. In 0.3 liters of warm water, 50 g of soap is diluted, 50 g of fish (or seal) oil and 10 drops of ammonia are added. Everything is well mixed, water is added to 0.5 liters, cooled to room temperature 18-20 ° C. The mezdra of the skin stretched on the rule of the skin with a brush is evenly moistened with a fat emulsion so as not to contaminate the fur. Then the skins are dried on the rules at room temperature. If the hairline is dirty, it is wiped with a cotton swab moistened with gasoline.10 Final push
and finishing the mezra of the skins with pumice is done, as in paragraph 5. Then they are sipped in different directions. Each skin is turned inside out with fur and shaken several times, holding the head and hind legs. The skins are ready. From them you can cut and sew fur products.Eyes admire clean, shiny, fluffy, soft, elastic fur, it is pleasant to lean against it with your cheek. The soul rejoices in the beauty created by nature and its labors.
Siberian fishing" №1 1996.
Provided information
The skin of a fox is beautiful and valuable, but in order to make a useful thing out of it, it must first be properly removed, processed and stored. Primary and subsequent processing will turn the raw material into a semi-finished product for tailoring, hats and other items. It is not easy to make processing, but it is possible, because they do not become furriers immediately, experience comes gradually and over the years.
Sequencing
How to skin a fox correctly? First you need to make incisions on the skin - from the middle fingers on the hind legs to the anus. Then on the front paws from the middle fingers to the elbow or armpit.
The skin begins to be removed from the hind legs, pulling it off with your fingers and cutting strong ligaments with a knife. The skin from the hind and front paws is removed along with the claws, they should remain on the skin.
When the skin is removed from the paws, you need to expose the root of the tail, and then begin to remove it from the back, and for this the carcass must be hung by the hind legs. Skinning the torso isn't difficult, it's the easiest part of the process, but you'll have to tinker with the head. Here you need to carefully cut the cartilage and ligaments on the ears, near the mouth and eyes, and then scrape off the meat and other protein materials. The nose remains on the skin as well as the claws.
dressing process
The primary processing of a fox skin at home consists of several stages, and one of them is degreasing, or skinning. To degrease the skin of a dead animal means to remove the remnants of fat, meat, and other biological residues from its underside. Or rather, squeeze the fat out from under the skin, and at the same time remove the remnants of the meat.
At this stage of processing, the skin is put on the disc with the flesh outward so that there are no folds. To prevent the skin from slipping off the rule, it is tied by the paws with a rope.

After fixing the skin, they begin to scrape it off with a knife from the tail to the head. If you scrape the skin from the head to the tail, the roots of the hair can be cut with a knife, which will cause bald spots to appear on it.
The most difficult thing in this process is squeezing out fat from under thick films, sometimes the film is removed along with the fat. After degreasing, the core is wiped with tow, paper or a rough cloth.
Now you can proceed to the next stage of dressing the fox skin, or, if it is not possible to do the processing right now, dry it thoroughly and send it to storage.
The skin after skinning is put on the rule and set to dry in a dry, well-ventilated area. At home, an attic or shed is suitable for these purposes. Sending to dry, the skin must be symmetrically stretched in different directions, for this the paws are tied to the rule with a rope. There should be no wrinkles or twists on the skin. The ears need to be turned out, and small pieces of cardboard should be inserted inside.
When the skin dries, it must be removed from the rule, wipe the mezra, and turn the fur outward, and then dry it from the front side. Remove dirt, burdock, and dried blood from the fur.
This completes the primary processing of the skin, it must be stored in a dry, cool room. If you do not have the opportunity to store the skin at home, sell it or hand it over to a procurement organization.
If you do not intend to keep the fox skin at home for a long time, you need to continue dressing it. And after prolonged drying, the skin must first be soaked. To do this, it is soaked in water for several hours or even for a day, the water in the container must be changed every 5-6 hours.
A well-soaked fox skin will look fresh. So that the skin does not start to rot, salt is added to the soaking water, at the rate of 50 grams per liter of water, and some antiseptics, for example, zinc chloride, which destroys bacteria and strengthens the fur hairs.
If the skin is freshly peeled and has just undergone primary processing, it should be washed in warm water with the addition of washing powder or detergent. The skin is washed on both sides, turning it with fur, then with the flesh out, and then rinsed in cold water.
Furriers advise to carry out all skin processing processes in water with a temperature not higher than 42 degrees, otherwise the material will deteriorate.
After washing, the skin will be pickled, or treated with acid. For one skin, you will need 7-8 liters of a solution of acetic acid and coarse salt. For 1 liter of water you need 10-12 grams of vinegar and 50 grams of salt. The salt must be well dissolved and the skin should be immersed in the solution for 8-10 hours with the skin outside. Stir the water from time to time to keep the salt from settling.
After pickling, the skin is taken out of the water, squeezed out without twisting, and laying on the bed under oppression for 12 hours.
Now you need to tan the skin. Prepare a solution based on 1 liter of water, 7-8 grams of potassium chromium alum and 50 grams of salt. In total, 1 fox skin will require 8 liters of liquid. The skin should be turned inside out.
After 10-12 hours, the skin is taken out and the fur is washed with washing powder, shampoo or liquid detergent. Water should be at room temperature, the splendor and quality of the fur depends on it.
After washing, the skin is again pulled over the rule with the fur outward, and dried. Dry fur begins to fluff, in which case the skin must be turned inside out and dried on a rope so that the skin also dries.
The next step is fattening the skin. Take 1 liter of water, 10 grams of ammonia, 50 grams of fish oil, 25 grams of aleic acid, and make two compositions in different containers. One from fish oil with aleic acid, and the second from ammonia and water heated to 40 degrees. Then mix both solutions in one bowl, and brush the skin with a brush from top to bottom with it.
The moistened skin should dry out, and while it dries, it needs to be stretched a little in different directions. Mezdra dries quickly, so you need to stretch it often - if this is not done on time, a completely dried skin will not stretch.
The semi-dry skin should be turned upside down with fur and dried, combed out with a massage brush or comb. When the fur dries, the skin is turned inside out again, with the skin out.
Now you need to knead the mezra, break it down so that it becomes soft and elastic. After that, the skin must be sanded with pumice stone or fine sandpaper. At home, the finished skin can be stored in a cool dry place in a bag, do not forget to put a moth repellent in it.
How are skins classified?
The highest quality are fox skins slaughtered in winter period. At this time, the fur is dense, the awn is thick, the fluff is also thick and uniform over the entire area of the skin. Mezdra is clean, thin with a slight bluish tint, which extends no higher than 10 cm from the rump.
In animals slaughtered at the end of winter - beginning of spring, the fur is dull, the axis on the sides and shoulders is thinned. The mezdra is also thin and clean, with a blue tint on the paws. These are small defects, so the skins are of the first grade.

In a fox slaughtered in early winter, the skin is not full-haired, the awns are low, and a groove is visible on the back. The flesh in the lower part is bluish - such skins are classified as second grade.
Autumn skins have a low awn, sparse fluff and blue all over the mezra - this is the third grade.
In animal skins, such defects as felted fur, attrition, wounds, bites, clogging with blood and burdock are distinguished. In sick animals, the fur is stunted, dull, underdeveloped.
In addition, defects can also occur during the hunting process, these are traces of bullets and shot, bruises, damage from a trap, backache, and so on. All of them also reduce the grade of the skin. Incorrect removal and storage, as well as poor-quality processing, can damage the skin.
What can be sewn from the skin of a fox?
A great many beautiful and useful things can be sewn from fox skins - fur coats, vests, sheepskin coats, hats, mittens, collars, bags, and such not quite familiar things as covers for sofas and armchairs. But for this, the skins must first be cut.
Cutting a fox skin is not so easy, it is a rather laborious and painstaking process. As in any business, an accurate mathematical calculation and accurate measurements are needed here. At enterprises, special templates are used for this, at home they can be made independently, or rely on your own skills.
In order for the product to turn out to be of high quality and beautiful, the skins in it must be located correctly. They should be of the same color and the same texture so that you can create the impression of a complete picture, or vice versa - make an original canvas due to fur stripes.
Furriers use several methods for cutting the skins of foxes and other animals: breakdown, soldering, re-rolling, stitching, draft, dissolution.
Breakdown - this type of cutting, in which the skins are aligned in size, height and shade of fur. The breakdown is longitudinal, when the skin is cut along the ridge, and transverse, in which the skin is cut across. Combined breakdown involves cutting the skin into four parts - along and across, after which they are connected.
By soldering, several skins with the same type of fur are connected into one elongated canvas. Soldering is performed according to patterns or by cutting the skins in straight lines.
Flipping means getting two or more from one skin, while maintaining the original length. The incision is made along the line of the ridge and two types of fur of different cost are connected. So, the skin of a rabbit turns into a squirrel, and a ferret into a mink. With the help of a flip, you can "repair" a damaged fox skin by adding parts from another skin.
Another way of cutting is stitching. It is used to reduce excessive fur density, to increase the width and length of the skin, to combine and save fur, to achieve a visual effect and highlight fur stripes.
Stitching is done in the transverse and longitudinal directions, increasing the length and width of the skin due to the stitching material - natural and artificial leather, suede, braid, and other materials provided by the technology.
The upset method is used to increase the width of the skin in the rump or neck part, by reducing the length.
The most difficult technique for cutting skins is considered to be dissolution. This method allows you to increase the length of the skin due to its width. There are several types of dissolution of skins - single-wedge, multi-wedge and two-wedge dissolution.
Complex cutting methods can be used for the skins of various animals, including foxes. The splendor, length and density of the fur allows you to create a single canvas, in which the cuts and seams are not visible.
For cutting the skins of animals with short fur, these methods are not suitable, since the seams on them are very noticeable.
The hunt was successful and you got your trophy. Now you are faced with the task of removing the skin and processing (preserving) so that it does not deteriorate during storage. Of course, it is better to do this immediately in the forest, and not at home, and while the fox has not yet cooled down, it will be easier for the skin to separate from the body. In addition, it will be easier to carry the skin, and not the whole fox, especially if you have a lot of trophies and they still need to be carried to the car.
The process itself will take us no more than 40 minutes.
How to skin a fox
It is better to remove the skin from the fox with a tube. To do this, use a sharp knife to cut the skin on the feet of the hind legs from the middle of the pads to the claw of the middle finger.
Then from the middle of the pads to the anus, along the inside of the hind legs. Next, cut the skin of the fox from the anus to the base of the tail. In the same way, the skin on the front paws is cut open, from the elbow joint through the foot to the middle claw.
Next, we separate the skin from the hind legs, holding the paw with the left hand, with the thumb of the right hand we separate the skin from the hind legs, and then the front ones. With a knife we cut the connecting film and the tendons connecting the phalanges of the fingers. After removing the skin from the paws, he proceeds to separate the skin of the tail from its core.
For the convenience of skinning, it is better to hang the carcass of the fox by its hind legs in acceleration.

After removing the tail, separate the skin from the body. Gently pulling it down, if necessary, cut the film from the skin. Approaching the front joints, first we take out one paw after the other, then the skin will again be removed easily.

Near the head, you need to help with a knife, because. in this place dense connective tissue. Carefully cutting off the ears (leaving a thin part of the cartilage in the auricle), we remove the skin from the tip of the muzzle, cutting the lips and nasal cartilage, completely remove the skin.
Primary processing of the fox skin
The removed skin should be well degreased and wiped with a dry and clean rag. If there are gaps on the skin, they must be sewn up with threads, while they should not be tightened too much, only until they close. The defatted and wiped skin of the fox is put on the rule, with the fur inward, the skin outward. It is important that the spine and tail are strictly in the middle. Place the rule with the skin at a slight angle so that the paws and tail do not come into contact with the main skin.
The skins should be dried at room temperature. After drying, remove the skin from the rule and turn it out with the fur and dry it.

Fox skin straightener