Mk polymer clay for beginners. DIY polymer clay. What you will need
Girls strive to express their individuality, and what else can help with this if not bright, unusual, unique handmade accessories?
Modeling from polymer clay is an entertaining hobby for women who are drawn to beauty! This is a unique material from which you can create decorations, accessories and crafts for the interior, embodying the most incredible creative fantasies. Working with plastic is no more difficult than creating figures from plasticine, but the finished products are not afraid of moisture, do not wrinkle or break.
A little history of a fascinating hobby
Unlike traditional materials such as glass, wood, ceramics, leather, which have been used for centuries, plastic appeared relatively recently. It was first developed and produced by puppet master Fifi Rebbinder in 1930 in Germany. It was intended for modeling the heads and faces of dolls.
34 years later, Fifi sold the formula of his invention to the owner of a pencil factory, Eberhard Faber from Nuremberg. An enterprising businessman, having improved the composition, two years later organized mass production of polymer clay under the brand name “Fimo,” which is still popular today.

As a hobby, modeling with polymer clay appeared even later, but today it ranks high on the list. Plastic is used for sculpting souvenirs, decorative dishes, jewelry, flowers for decoration and bouquets.
Where to start for a beginner sculpture

The hobby of modeling does not require much material costs. The only thing you will have to spend money on is plastic, otherwise you can get by with improvised means. To get started you will need:
- polymer clay. You need to buy material in white, black and several pieces already tinted, depending on the color combination final product. You can also paint white clay yourself with oil paints to the desired shade;
- stationery knife;
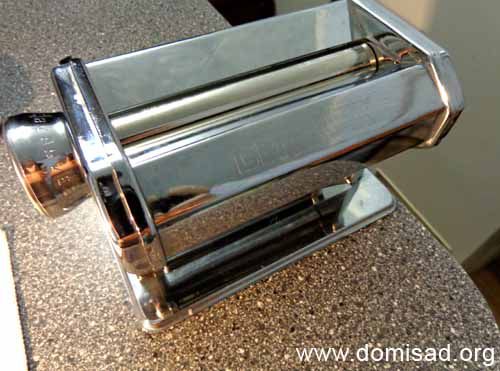
- rolling pin for rolling out plastic. Typically, professionals use a pasta machine for these purposes, but it can be replaced with any metal or glass object that can perform the functions of a rolling pin. This could be a smooth glass, a narrow bottle without embossing on the surface, a can of hairspray;
- work surface. A glass board, thick cardboard, or plain white board is suitable for this. office paper A4 format. It is not recommended to use plastic surfaces, since the plasticizer included in the thermoplastic may react with it;
- devices for forming the texture of the product. There can be any available materials with which you can create the required texture - toothpicks, fabric, corrugated paper, tree leaves, flower petals, etc.

Types and features of material
First of all, polymer clay for modeling is divided into self-hardening and baked. The difference is that in the first case, the plasticizers, which give the mass softness and plasticity, evaporate at room temperature, and in the second, it is necessary to place the finished product in “hot conditions.”
Polymer clay without baking
Self-hardening plastic – modern material, which hardens in air without additional heat treatment. To gain hardness and strength, small crafts only need a few hours, large ones – a few days.
This group includes light and heavy clays. Products made from heavy polymer clays are difficult to distinguish from pottery clays; they can be subjected to additional processing - sanded, painted, varnished. This type of plastic is ideal for large souvenirs, figurines, and decorative dishes. The disadvantage of heavy clay is shrinkage, so not all materials in this group are suitable for delicate work in which details are important.

The lightweight plastic looks like marshmallow mass; the main component of this material is cellulose. Working with light plastic is a real pleasure; it produces believable artificial flowers. The disadvantage of cellulose plastic is the fear of moisture; such works cannot be washed or wetted, so they are not suitable for costume jewelry.

Features and types of thermoplastics
Thermoplastics requires heating up to 110-130 degrees to evaporate plasticizers. To do this, use a regular home oven or electric oven. Thin products (for example, small flowers) are baked for 5-8 minutes; baking products 3-5 mm wide require about 20 minutes. It is convenient to boil small items, such as beads, in water.
Baked plastic comes in different types:
- standard, sold in bars of the same color or in sets;
- with fillers, imitating natural stones and metals;
- with glitter and pearl;
- colorless;
- changing color after baking;
- gel, used to join parts;
- flexible, able to bend after processing.

It is not recommended to make products from thermoplastic with a width of more than 1 cm, since the material does not polymerize inside, and over time the product will become loose and may crumble. Therefore, it is better to make large and voluminous figures hollow.
How to work with plastic correctly
The properties of the mass resemble plasticine, only it is more plastic and does not stick to your hands as much, but the finished products, hardening under the influence of temperature, are hard and durable. Ripe fruits and berries, delicious muffins and cakes, incredible flowers, favorite cartoon characters - the possibilities for creativity with plastic are unlimited!

To start working with plastic, you need to first knead it. It’s better to start with small pieces; don’t try to knead all the material at once. To make work easier, you can put the briquettes on the battery, or warm them in your hands.
You need to knead until the mass becomes soft, elastic and viscous. If the clay is too hard, crumbles and cannot be kneaded, this means that part of the plasticizer, which gives it plasticity, has evaporated. In order to restore the plasticity of clay, you need to add a little plastic softener or mix dried plastic with fresh material.

Different colors of polymer clay mix well with each other. Therefore, if you lack a certain color or need to get a certain shade, feel free to combine them with each other. It is better to work with thermoplastics while wearing gloves, as this will result in more accurate products without fingerprints. The working surface must be clean, free of dust and debris.


Master classes on modeling from polymer clay
Based on our step by step wizard-polymer clay modeling classes, you will quickly master all the subtleties of this handicraft and learn how to create designer jewelry and original gifts with your own hands.


There is probably not a single jewelry lover who does not know what polymer clay is. Let's try to figure out together what polymer clay is, what are the features of working with it, its capabilities and disadvantages.
Polymer clay, or as it is also called - plastic, according to appearance and its properties resemble plasticine, but there is one exception - this is the plasticizer included in its composition. Because of this chemical composition, it is not recommended to sculpt for children under 8 years of age. The plasticizer completely evaporates after heating; as a rule, finished products are baked in an oven at a temperature of 110° to 130°C, but some domestic clays can be boiled. After heating, polymer clay products become very hard, and if the temperature is maintained correctly (this is the main key to the success of the finished product, otherwise if it is not baked enough, the product will crumble, and if it is overheated, it will darken) the products are durable and strong.
The very first thing you should start with is choosing polymer clay. There is a large selection of plastics on the market: PREMO, SCULPEY, KATO, PARDO, FIMO, CERNIT from domestic Sonnet clays, Polish - Plastishka. In my opinion, it is better to try working with expensive plastic right away, so as not to discourage the desire to sculpt further. When buying polymer clay, pay attention to the expiration dates: fresh plastic will be too sticky and you will have to frequently wet your hands when working with it, but old plastic will crumble and you will either have to throw it away or buy a softener for it, which usually costs 2 times more expensive than the clay itself. You can buy polymer clay in art, stationery and stores that sell everything for creativity, and, of course, online stores.
Tools for modeling from polymer clay:
What tools are needed for sculpting? At first, when you just want to try the material and its capabilities, you can get by with the tools at hand.

Hard work surface: best to use ceramic tiles– sculpt on it and bake immediately, glass is also suitable, but I don’t recommend baking on it - it may burst, but at worst you can get by with an ordinary white sheet;
Cutting tool: ideally, this is a thin bendable blade, but a simple stationery knife will do, and for small jobs - a razor blade;
Toothpicks - you really can’t do without them: make a hole, roll out thinly small elements from clay, give bends, fix the parts on plastic. The needle also copes well with these duties;
A rolling pin for rolling out clay or creating a smooth color transition. There are specialized rolling pins and rollers, but you can use any glass or metal cylindrical objects. I do not recommend using plastic or wooden rolling pins - otherwise the polymer clay will stick to their surface. Ideally, have a pasta machine (noodle cutter), it gives freedom of action and speeds up the modeling process;
Wet wipes and gloves are what will ensure your work is clean and tidy. After each color, you should wipe the work surface and hands with napkins, and gloves will help you avoid marks and prints from fingers and hands;
Cutters are metal molds for cutting shapes from raw clay. At the first stage of getting acquainted with plastic, any caps from bottles and bottles can serve as cutters;
When working with plastic, absolutely anything can be useful: any beautiful textured surface, rounded surfaces, brushes, glitter, buttons, etc.
How to sculpt from polymer clay?
First step.
Before starting work, you need to knead the plastic thoroughly in your hands, when the material becomes soft and pliable, do with it whatever your imagination suggests. A small elementary example of what can be made from two shades of plastic, having a minimum of available tools and skills in working with plastic, in five minutes:
Use your fingers to form a drop-shaped shape from green plastic and flatten it to the work surface. Apply imitation veins with a toothpick. The leaf is ready.


Roll five small balls from purple plastic and flatten them onto the work surface with your fingers. Use a blade to pry and lay the petals overlapping each other. The flower is ready.

In the 1930s, Germany invented an amazing material for creating extraordinary products – polymer clay. At first, dolls were made with it, but in the 60s it rapidly gained popularity, after which clay began to be used to create various sculptures and compositions.
Now they are creating from this material original jewelry, souvenirs, flowers. Wedding bouquets are excellent made from polymer clay, so clay has become an indispensable material for wedding celebrations.
You too can learn how to make gorgeous crafts from this wonderful material. In order to create your first masterpiece, you will only need to familiarize yourself with the material below.

Tools for modeling from polymer clay
- Surface to work on. You can take a flat and perfectly even board made of glass or plastic, tiles or ceramics.
- Knife. Suitable for both stationery and construction. Have spare blades on hand.
- An acrylic rolling pin is very convenient for rolling out clay.
- A syringe and various attachments with which you can make various stripes and floral elements.
- Forms for cutting out shapes (cutters).
- Stacks.
- Polymer clay.
- Varnish for polymers.
- Brushes of different sizes.
- Toothpicks.
- Napkins.
- Fittings.
Before starting work, the clay needs to be kneaded well.

- First, wash your hands well, as clay perfectly absorbs various contaminants. Keep your work area clean too. Tie up your hair or put a scarf on your head.
- Apply talcum powder to the clay to prevent debris from sticking to it.
- Calculate the amount of clay correctly, because colored clay has a short shelf life.
- When the clay dries out, don’t lose heart, just add regular hand cream to the material, but not too much.
- Be careful with clay products - they are quite fragile.
- Store packaging with material only in closed. So that the clay will serve you through long time, put a damp cloth there.

Polymer clay at home
If you do not have the opportunity to purchase ready-made clay in the store, then below is the recipe. homemade of this material.
You will need: baby butter, flour (1 teaspoon), regular white glue (1 teaspoon), cornstarch (1 teaspoon).

Combine starch, glue, add flour. Stir until the mixture resembles clay. Next, add five or six drops of oil to prevent the clay from sticking to your hands. To make colored clay, take some of this material in your hand, drop a little acrylic paint and knead it in your hand.

Polymer clay flowers
Calla lilies
For those who are just starting to work with polymer clay, it will be easiest to make calla lilies. This is a very simple craft and can be done in a matter of minutes. And if you decorate the resulting flower with beads and thread a special hook into them, you will get gorgeous earrings.

Take a couple of clay flowers, a toothpick, a utility knife, rubber gloves and beads.

Make a sausage out of the clay pieces, then roll them around one another. Roll the resulting product into a ball. Do these manipulations until you get a marbled color. After this, use a knife to cut the ball into two equal parts.

Make a rounded flat plate and slightly extend its edge, which you pin with your fingers. Carefully roll up the opposite edge (like a paper bag).
Straighten the edges and correct them. You should end up with a pop-up bud. Use a toothpick to make small holes and insert the earring and beads into the flower.

Lily
Lily is more difficult to make than calla lilies, but the result is worth it!
Take clay of the color you like, a bottle or rolling pin, an awl or a large needle, a knife, paints (preferably watercolor), brushes, paper clips.

Put gloves on your hands, take a piece of clay, roll it thin, outline the petals. Draw the boundaries of the petals with a needle. You should end up with three large and three small petals. Small petals will be in the center of the flower.
Cut out the resulting petals using a knife or scissors. Draw veins on the petals - it looks very beautiful.

Let the resulting components dry, and then start making the center of the flower, namely the pistil and stamens. Roll out the clay and cut into thin strips. Make the strip for the pestle wider and apply brown color to its tip. Using a needle, curl the edges of the smaller petals. Straighten the paper clip and attach the flower to it, starting with the pistil and stamens. Next, attach the petals symmetrically.
Rose
Roses are considered the most sought after flowers, even if they are made from polymer clay. To make this beauty, take polymer clay and put gloves on your hands.

Make a sausage out of a piece of clay, cut it into pieces, from which you make balls of various diameters. Nine balls will be enough if the rose is small.

Make oval petals from the balls. To do this, place a ball on your left palm and apply pressure with the thumb of your right hand. Forming a petal. We make the edges of the petal thinner and the base denser. We do this with all the balls. After that we collect the rose. Make the middle of the flower - roll one petal into a roll. Next, attach the petals to the center from smallest to largest. Make sure that each petal covers the middle of the previous one.

The rose is done. It is perfect for decorating various accessories. It would look great as a refrigerator magnet.

Orchid
After you have practiced making a rose and calla lilies, you can begin making an exquisite flower - an orchid. To work, take clay, a flat board, gloves, a rolling pin, wire, a special form for cutting, a knife, brushes, paints, molds, a stick with a rounded tip.

Using a stick, paint a piece of clay and make a small protrusion in the middle. Use a cookie cutter to cut out a cross - this will be the middle of the flower. If there is no shape, then draw the core yourself. We take the resulting part in our hands and bend its upper tip inward. Using a stick, we bend the remaining pieces in the same way.

Take the wire and bend it into a right angle. We put the middle of the flower, coated with glue, on the tip of the wire. Make the middle part of the flower sponge from a small piece of clay. To do this, make a grain out of it and cut it a little with a knife. Place it on the wire in the middle of the sponge. Color your flower lip.

After this we make the petals. Roll out a painted clay piece that has a protrusion. Place the blank on the mold and cut off the excess. We attach the wire to the base. We make five more petals in the same way. Draw dots on all petals. Take all the petals, lip, connect. It turned out to be a gorgeous orchid!

Crafts made with polymer clay are gaining popularity every day, and the type of ceramic floristry is developing. They sell well and are highly rated.
It is worth noting that modeling from this type of material is in demand not only among needlewomen. Children are becoming more and more interested in this type of art. This activity is very exciting, with its help your child will actively develop and relax. Children will be very happy to help you make crafts and decorations.
Learn to create masterpieces from polymer clay, and you will discover new world art, with which you can create chic jewelry and even have additional income from your work!
117 photos of color examples


According to experienced craftswomen, it is impossible to make two flowers from clay that would be absolutely similar to each other. Individual plastic flowers and whole bouquets self made will always be original and unique. Therefore, such crafts created by the hands of craftswomen are real works. applied arts and are very highly valued by people. Clay flowers can effectively decorate a wall clock, vase, panel , furniture and other interior objects. A bouquet with clay roses or gladioli can be chosen as a win-win accent to the interior composition. Clay flower arrangement as decoration gift packaging looks no less impressive than decor in the form of flowers made of foam or kanzashi made of ribbons.
Fired clay is often used to make various women's accessories. - bracelets, beads, decorations for hairpins or headbands for hair , brooches, handbags. And self-hardening clay is perfect as a convenient material for sculpting flowers with petals of a given shape.
Today, handicraft masters are increasingly using to create handicrafts with their own hands. polymer clay, which is more flexible and easy to work with than natural clay. Made from polymer clay exquisite jewelry and beautiful boxes , decorated with flowers. And wedding bouquets in the shape of a ball made from clay flowers look simply amazing in the hands of the bride. Currently, the services of masters in ceramic floristry are becoming very popular for wedding events . Flower arrangements and wedding bouquets made of polymer clay are durable and perfectly preserved in their original form for many years.
Absolutely anyone can learn how to create flowers from polymer clay with their own hands! You can quickly and easily make the simplest clay flower the first time after watching a master class with photos of the modeling stages. Below you will find step-by-step master classes and video lessons for beginners.
But first, let's find out what tools you will need to sculpt and fold crafts in the form of flowers from polymer clay:
work surface.
It is convenient to work with clay on a high-quality plastic modeling board, on tiles, on plexiglass;
stationery or construction knife with replaceable blades.
With a knife you can cut out individual elements from plastic and divide it into parts;
acrylic rolling pin.
This transparent rolling pin is very convenient for rolling out polymer clay;
extruder in the form of a syringe with nozzles.
It is very convenient to squeeze out curly sausages of different thicknesses and shapes. It is very convenient to form compositions and individual flower elements from such sausages;
cutters.
These are molds of different sizes. With their help, you can quickly cut out various flat shapes from clay rolled out with a rolling pin;
texture sheets and stamps.
For forming patterns and texture on the surface of artificial petals and leaves made of polymer clay. If, in addition to this, you give a realistic shape to the details of the craft, then the flower assembled from them will look like a real one;
stacks.
With their help it is convenient to make some drawings on clay blanks. Stacks are also indispensable when sculpting small parts of crafts.
How to make polymer clay with your own hands at home:
It is not necessary to buy this popular material for making flowers in the store. Let's find out how you can make polymer clay easily and simply with my own hands Houses.
Ingredients:
baby oil;
1 hour flour;
1 hour universal white glue;
1 hour corn starch.
Recipe:
In a glass jar, combine cornstarch, white glue and flour. Stir with a spoon until the consistency acquires the properties of clay;
Then you need to add 5-6 drops of baby oil so that the artificial clay is not very sticky;
It remains to give homemade clay desired color. To do this, add to a piece of clay acrylic paint and press in your palm so that the paint is evenly distributed;
Make pieces of clay of different colors to make a flower or any other craft.
2. PHOTO INSTRUCTIONS. HOW TO QUICKLY MAKE A BEAUTIFUL ROSE FROM POLYMER CLAY AT HOME

3. MASTER CLASSES FOR BEGINNERS. HOW TO MAKE FLOWERS FROM CLAY IN DIFFERENT WAYS
Master class No. 1:
ORCHID, LILY, KALA, ROSE FROM POLYMER CLAY. FOUR WAYS TO MAKE AMAZINGLY BEAUTIFUL ARTIFICIAL FLOWERS WITH YOUR OWN HANDS. STEP-BY-STEP LESSONS WITH PHOTO FOR BEGINNERS.
Master class No. 2:
PLASTIC MOLDING CRAFTS IN THE FORM OF A WILD FLOWER. LEARNING TO MAKE THE FINEST PETALS FROM CLAY AND MODEL BEAUTIFUL FLOWERS TO DECORATE INTERIOR OBJECTS.
Master class No. 3:
HOW TO MAKE A FLOWER FROM POLYMER CLAY WITH YOUR OWN HANDS. STEP-BY-STEP LESSON WITH PHOTO ON MODELING PLASTIC CHERRY FLOWER FOR DECORATING HAIR CLIPS.
Master class No. 4:
CERAMIC FLORISTRY FOR BEGINNERS. HOW TO MAKE SMALL NARROW PETALS FROM PLASTIC AND MAKE A DAHLIA FROM THEM (PHOTO STEPS STEP BY STEP).
Master class No. 5:
FLOWERS FROM POLYMER CLAY FOR DECORATING A PICTURE. DESCRIPTION OF ALL STEPS OF MODELING A HIBISCUS FLOWER WITH PHOTO OF EACH STEP.
Master class No. 6:
ANOTHER OPTION FOR MANUFACTURING A HIBISCUS FLOWER FROM POLYMER CLAY. PHOTO OF EACH STAGE OF MODELING PETALS AND SEPALS WITH YOUR OWN HANDS.
Master class No. 7:
HOW TO MAKE A SMALL WHITE FLOWER FROM CLAY. WITH SUCH ARTIFICIAL FLOWERS YOU CAN DECORATE A WEDDING BOUQUET OR A WEDDING ACCESSORY (HAIR RING OR BARRET).
Master class No. 8:
Working with polymer clay must be properly organized. First of all, prepare workplace. It should be well and evenly lit. Place a work surface on the table (this could be different materials, but the most successful is glass, since clay will not stick to it, glass is easy to keep clean) and everything you need to have materials and tools at hand.If you are just learning how to handle plastic and are experiencing difficulties in making products, then it is better to first draw them on paper, that is, make a sketch - this way it is easier to correct any defects found and you do not have to spoil the material. If you are confident in your abilities, then move on to the next stage.
Before you begin to implement your plan, the clay must be kneaded to give it plasticity and turn the cold mass into a pliable soft material. Clay heats up well from the warmth of your hands, so never neglect this work and do not waste time on it. In addition to the fact that the clay will become elastic, air will be removed from it, the bubbles of which, during firing, will appear on the surface of the product in the form of unsightly bumps.
 2
2
To start, take a small piece and gradually add more to it. With this method of work you will avoid the above inconveniences.
Rules for mixing colors.
Despite the fact that the color palette of polymer clay can be very diverse, there is still a need to get a new color or shade. Therefore, you need to be able to mix colors correctly. 3
3
Mix clay of any colors (including from different manufacturers), but be careful
proportions.
3-5 minutes are enough for the two colors to completely mix.
Before combining all the available material, make samples.
Remember that dark colors can overwhelm light ones.
If you do not mix clay of different colors until smooth, you can get marble plastic.
It happens that you need clay of a certain color, but you don’t have it at hand. You can use a color mixing chart to get the color you want.
By adding white plastic to any color, you will get the desired shade. The more white clay there is, the lighter it will be.
Tricks and subtleties of handling plastic.
To avoid having to deal with fingerprints on the product, you can wear rubber gloves. If fingerprints still remain on the surface, sometimes it is enough to wet your fingers and lubricate them. You can use another method: finish the product, burn it and sand it. However, the paper leaves behind grooves that trap tiny crumbs and dust, making them even more obvious.To get rid of such defects, you need to wash the product with soap and a brush, and then coat it with varnish. There are craftsmen who prefer to sand their crafts directly under running water in order to immediately see the result and prevent dust from appearing in the air.
 4
4
During sculpting, especially when making a multi-colored product, it is necessary to prevent contamination of the raw plastic. To do this, the work surface and tools must be clean. In addition, you should wash your hands with a soft brush or keep wet wipes near your work area. They contain substances that are good at removing fatty substances, which also include plasticizers in polymer clay.
Often there is a need to remove stuck debris from already finished work. To do this you need to resort to grinding. If this does not help, then carefully cut off the speck with a sharp knife.
It happens that the plastic is not satisfied with its softness or hardness. To make it softer, there are many ways, for example, combining it with Vaseline, other soft clay, heating it, or introducing Moldmaker plasticizer.
 5
5
If the clay literally melts in your hands, then either mix it with drier clay, or hold it on a white sheet of paper for 2-3 hours, during which the excess plasticizer will be absorbed into the sheet. If the plastic begins to stick to your hands after adding pigment or paint, this cannot be corrected, since interaction has begun between the components.
Basic techniques.
You can work with polymer clay using various techniques.Salt technology.
It can be used to make beads, on which, thanks to salt (sugar will also do), a spectacular loose structure reminiscent of pumice is formed. 6
6
Make required quantity beads Add coarse sea salt (or sugar) and roll the raw beads in it, pressing in the salt crystals. Bake or boil one at a time in water according to the instructions. Immerse the fired product in a container of water. Wait until the salt dissolves, then dry the beads. If necessary, varnish them.
“Millefiori” (“cane”, “sausage”).
One of the most popular techniques, when working in which simple elements can be used to create a complex pattern, for example, on leaves, petals, etc. To do this, layer layers of clay of the desired color and shape on top of each other, observing the given order. This creates a part that needs to be compressed and cut like a sausage. A pattern will appear on the cut. 7
7
"Watercolor".
In this case, you need to simultaneously work with three layers of different colors - colored, white and black (other contrasting colors can be used). Place them on top of each other in the following sequence: color (top), white (middle), black (bottom); roll them; tear the layer into small fragments; Place randomly on the craft, covering the entire surface. 8
8
"Filigree".
The elements of this technique are grain and thread. Lay out the thread (pass the plastic through an extruder or roll it by hand) into an openwork pattern, placing accents using grains (small metal balls). 9
9
“Mokume gane.”
As in the watercolor technique, you should take several layers (at least two and no more than six) of different colors and place them on top of each other; stamp the resulting block with shapes, press with any suitable tools (for example, a knitting needle, etc.), cut with blades (wavy or straight), etc. Due to the fact that the upper layers of plastic penetrate into the underlying ones, unusual patterns will appear on the sections. 10
10
"Mika-shift."
Which involves plastic interspersed with mica. Various manipulations that can be done with clay, such as twisting, stamping, etc., cause the mica particles to move, creating a three-dimensional effect. In addition, one can name the “kaleidoscope” technique, the technique of smooth color transition, etc. 11
11
Gluing parts.
The glued parts will hold firmly if you choose the right glue. This can be Contact-Gel glue, which will firmly bind the parts to the base, for example, rings. If you need to glue a pin, then drill a hole with a slightly larger diameter under it so that there is room for the glue.You can try using epoxy glue (on the waste element first). It generally produces a reliable connection, but has an unpleasant odor.
 12
12
To fasten clay parts to each other or baked plastic to raw plastic, a special baking gel is suitable ( liquid plastic), for example Fimo liquid deko gel, Kato liquid clay, Translucent liquid Sculpey.
Baking the finished product.
When baked, thermoplastic releases toxic substances, so you should not use the same oven where you cook food. If you plan to do plastic arts professionally, it is best to purchase a special kiln for firing and set up a workshop outside your living space.What you bake it on also matters. You can choose a board, glass, ceramic (not acrylic) tile, a baking tray, having previously laid baking paper on it (otherwise the product will overheat and burn), a plate (of course, then it cannot be used for its intended purpose), etc.
 13
13
When firing, the shape of the product must also be taken into account. If it is flat, then to avoid swelling you need to put a small load on it; If the product is round, for example a bead, then in order to prevent its deformation, burn the product by placing it on a toothpick and sticking the latter into crumpled foil.
How long the product needs to be kept in the oven is determined by its thickness. If, for example, it does not exceed 5 mm, then 15 minutes is enough. Accordingly, the thicker and larger the craft, the more time it takes to fire it, especially since this makes it stronger. As a rule, masters are limited to 30 minutes. Pay attention special attention compliance temperature regime.
 14
14
It is very important to remove the product from the oven correctly so that microcracks do not appear in it due to temperature changes. The craft should be left in the oven until it cools completely, simply opening the door slightly.
So, if you prefer to work with baked clay, then to ensure that the result does not disappoint you, follow certain rules.
Follow the instructions provided by the clay manufacturer and adhere to their instructions and precautions.
Never set the temperature by eye. With the right setting (no more than 130 degrees, as stated on the plastic packaging, although, for example, for Fimo it is 110 degrees), the clay emits a slight odor, and this is normal. When the temperature regime is violated in the direction of its increase, polyvinyl chloride decomposes, which is accompanied by the release of hydrogen chloride, a very toxic substance. But the opposite should not be allowed - decreasing the temperature below the specified limit, since in this case polymerization does not occur and the product becomes brittle.
Be sure to test the material by taking a small piece of clay for firing. This will allow you to adjust the operation of the oven (perhaps it will be enough to move the finished product to the lower shelf).
Remember that plastic may change color after baking.
Never use a microwave oven instead of an oven, as it will warp the plastic, burn and may explode.
When finished, cool the oven and clean it.
If the oven is not equipped with a thermometer or if you are afraid to use it, then instead of baking, boil the product in boiling water (remember that you can no longer cook food in such a pan). 30 minutes is enough for fixing.
This method is applicable, although it should be recognized that the product will be less durable than when fired; A whitish coating may appear on the craft, to remove which you will have to apply a layer of vegetable oil to it. In addition, we note that this method of fixing plastic is not suitable for every type of polymer clay, since the temperature of boiling water does not exceed 100 degrees.
If you purchased air-hardening polymer clay for modeling, then leave the finished craft on the table until completely cured, which may take from several hours to several days.
Varnishing of the product.
When varnishing, first degrease the surface of the product by washing it with soapy water or wiping it with a swab moistened with alcohol. This is especially important when using water-based varnish.Thread a product or part, such as a bead, onto a knitting needle and dip it in varnish; remove it and rotate it around its axis so that the varnish lays evenly, then insert the knitting needle into a piece of foam rubber and remove the drop of varnish that appears.
 15
15
If the varnish is contained in an aerosol package, the intensity of varnishing depends on the distance to the product. A matte surface can be obtained by holding the can away and spraying the varnish in small portions; glossy - if you place the can closer (but not too close, otherwise foam will appear on the surface of the craft) and give it a powerful jet. If the product is flat, then coat it with varnish one by one, then the other.
When varnishing, unforeseen situations may arise that must be dealt with competently.
Sometimes the product begins to stick to your hands after a while. There may be several reasons: firstly, the wrong varnish was used; secondly, the product was poorly baked, as a result of which the clay did not polymerize, and the released plasticizer interacted with the varnish. You can try additionally keeping the product in the oven for 10-15 minutes at a temperature of 110-130 degrees. If there is no result, remove the old coating and apply a layer of another varnish.
To remove water-based varnish, leave the product overnight in water, adding lemon or pouring water. acetic acid. Mineral varnish can be removed with a solvent, such as white spirit; it must first be tested for reaction with the varnish.
If the varnish has formed streaks on the surface of the product, there is only one reason - the varnish is too thick. It must be diluted and used as a primer, onto which a thick varnish is then applied.
 16
16
- If the product was varnished, dried, but cannot be removed from the knitting needle, then most likely the varnish and the knitting needle are stuck together. Trim the stuck edge with a blade or hold the product in the oven for a while to soften the varnish.
Often white and light varnished products turn yellow. This is possible if the varnish does not contain UV filters. Read the instructions carefully before using the varnish.
Safety precautions.
Polymer clay is an artificial material containing chemicals, therefore the question of the safety of working with it and using products made from it does not lose its relevance. When contacting your hands, the plastic does not cause any unpleasant consequences, i.e. it is safe. However, this does not exclude the implementation of normal hygiene procedures, in particular washing hands after work. In this case, it is advisable to use scrubs or pumice stones and thoroughly clean the surface of the palms and fingers from the smallest particles of plastic. 17
17
- To effectively remove polymer clay from your hands, apply a small amount of vegetable oil to them, rub, and then wash your hands with regular toilet soap.
- The utensils and tools that you use when sculpting and baking plastic are not intended for other purposes. At the end of the work, they should be washed and wiped dry.
Let us say again that a special oven is needed to fire clay.
If you overexposed the product in the oven (you will understand this by the sharp and unpleasant smell), then immediately turn it off, open the windows and doors, take children and animals out and leave the room, having first removed the overheated product from the oven. If this produces smoke, cover your nose and mouth with a damp towel to protect your respiratory system from gaseous hydrochloric acid (hydrogen chloride).
If you feel unwell, contact medical care and be sure to inform the medical staff about the circumstances of the incident. If there were unprotected foods on the table, throw them away.
Since products can be subjected to further processing, in particular grinding, safety precautions must be observed here too. When drilling or grinding, use a respirator to prevent dry dust from entering your lungs. Also, wear safety glasses to keep dust, tiny plastic particles, and even thrown objects like a bead from getting into your eyes.
 18
18
- The finished product made of polymer clay can be coated with varnishes.
Follow safety precautions, especially when using aerosol varnish. When liquid is splashed, tiny particles of varnish enter the air, which can settle on the mucous membranes (if this happens, rinse them with plenty of water and, if necessary, seek medical help). Therefore, carry out varnishing in a well-ventilated area; protect your respiratory organs with respirators, your eyes with goggles, your hands with gloves; follow the instructions.
Often plastic products are in the form of edible products - cakes, pastries, etc., which is especially dangerous if there are small children.