How to make your own photo book at home. Create a photobook online with your own hands. Tips. Anniversaries and other important dates and events
A photobook is more than a photo album. It conveys the mood, impressions, reflects the history captured in photographs and supplemented by drawings, patterns, fragments of phrases. A photo book can be made in expensive binding, on high-quality paper and in any available format.
The photobook does not have to be used as a personal photo album. It can be a corporate book or a chronicle of the city's historical events in photographs. The application options are endless. Wedding photobooks are very fashionable now.
Many printing houses offer services for the production of photo books. It can also be designed and made up in most photo studios. But a designer will never be able to convey your feelings through printed pages the way you can. After all, in order for a book to come to life, you need to put your soul into it. Then there will never be two identical books.
In fact, creating a photobook on your own is not so difficult. There are a large number of graphic editors to create it. They differ in functionality, interface, cost, availability of online communities and technical support services.
The program interface is all means and methods of human interaction with this program, used both for entering information and for receiving processed data.
Of course, your choice should be made in favor of the program with the lowest cost with the greatest functionality and simplicity of the interface. However, if you are only mastering design art, then you do not need the widely presented possibilities of graphic editors.
Pay attention to the intuitive interface, large library of templates and low cost. You can even start with the free version of the photobook software.
In addition to all the other advantages of creating a photobook on your own, it is worth noting one more. You can not order its production in paper form, but store it in electronic form and send it to your friends and relatives by e-mail.
Popular graphic editors
There are several popular programs for creating photobooks.
HP Photo Creations Editor is a graphical editor that allows you to change the design of a photo book, calendar, collage, postcard. The editor uses over 1800 high quality art samples, 1300 graphic segments, fields using text, frames, editing tools.
Scrapbook Flair - developed by Aurora Digital Imaging. Its simplicity is ideal for beginners. The program is offered with the support of the Scrapbookflair online community. You also have the opportunity to use patterns, textures and other elements to decorate the photo book.
Wondershare Photo Collage is a simple, powerful editor that allows you to create photo albums as well. The program has templates, cliparts, .
Clipart are graphic design elements. Used in the creation of design projects. They can be presented as separate objects or whole images.
Adobe Photoshop is a very good professional-level graphics editor. Perhaps, its only disadvantages include too much space on the hard drive and an interface that is difficult for beginners to understand (requires additional time to study).
Not all programs are equally compatible with different operating systems. The graphic editors named above work in Windows. At the same time, Apple iPhoto runs on Mac OS.
Vera Mironova, family photographer: opens up the opportunity to express yourself creatively, to tell your photo story. The subject can be anything. This is the story of your baby for a year, and vivid impressions of a summer vacation, and photos with your beloved grandparents, collected specially as a gift. A matter of your imagination. There may be photos of large and small sizes, full-page photos, comments and memorabilia. Photobook is a flight of creativity!
Here are some tips on how to easily and simply make a spectacular concise photo book.
Design
When creating my photobooks, I adhere to the principles of simplicity and contrast.
For example, on one page of the spread, you can place a half-length portrait of a child, and on the second - in full growth. This creates a "big/small" contrast. Another option is to place a color photo on one page and a black and white photo on the other. Or on one page - one large photograph, on the other - a series of pictures of the same subject.
I also love the simplicity of the design. This means that I do not use any patterned frames, additional pictures and background substrates. In my opinion, all this distracts from the essence.

A full-page photo will not leave anyone indifferent. After all, the larger the size of the photo, the greater the effect it produces. A group portrait, a single portrait, a landscape are all great options for spreading a photo book.

When framing, pay attention to the principle of sufficiency: in this case, the child has “left” bangs. If the bangs are “cut off” when cropping, then the photo will look inharmonious. Harmony arises from the fact that we have the opportunity to "think out" the girl's hairstyle. So always be careful if your framing leaves room for "finishing" finish.
Typical mistakes when making a photo book:
- Placement of two identical photographs on one spread. For example, in one photograph, the child looks directly at the viewer, and in another (with similar framing) - to the side. In this case, the photos are placed as follows: on one page one, on the other - the other. The principle of contrast in this case is not observed, and the viewer will not be interested and bored to consider this spread.
- Placement of a large number of photos of the same size on a spread. Again, the principle of contrast disappears. The viewer does not understand what to focus on, and his eyes begin to wander incoherently.
- The use of a large number of various "decorations" - frames, pictures, multi-colored substrates. All this distracts the viewer from contemplating your photos and, most importantly, from the Heroes of your photo book.

A spread option using a photo as a background (with reduced transparency) and a series of shots.
Layout
Nowadays, there are many companies involved in the production of photobooks. As a rule, they all have their own convenient and easy-to-use photobook layout programs. In such programs, there are options for spread templates that allow you to quickly and easily select the desired photo arrangement.
Photobook spread template
You can also prepare spreads for your future photo book using a graphic editor, for example, in Adobe Photoshop, after downloading templates for layout on the publisher's website.
Cover
Most often, manufacturers offer a choice of several cover options: a photo cover, a cover made of artificial and natural leather, a cover made of fabric. It is also possible to insert a photo into a cover made of leather (both artificial and natural) and fabric. I like the imitation leather version with a photo insert, as well as the embossed cloth book, because of its practicality and individuality.
When creating the cover design, I also adhere to the general principle - simplicity.
For the cover photo option, you can fit the photo to the full size of the cover. Most often, the photo cover can be made either matte or glossy. As practice shows, the probability of scratches increases on a glossy cover. The matte cover is more practical, and in turn makes the photo visually “warmer”.
Photobook size
My choice is a book in the form of a square measuring 30x30 centimeters. In this option, it is possible to place photos in full spread (30x60). You can also place both vertical and horizontal photos on one page, as well as several photos on one page. In addition, 30x30 is a fairly large photobook size with the ability to show large-sized photos.
Number of spreads and paper
The number of spreads directly affects the type of paper selected. If it is 25-30 spreads, then it can be matte or silk paper applied on a thick cardboard base. In this case, the sheets will be dense and thick, and the book itself will be quite weighty. With the silk paper option, you will have additional page protection against fingerprints.
Over 30 spreads, it is better to choose thin, dense matte or designer paper. In the version with designer paper, the sheets of your future photo book will be tempting to touch.
Photo selection
The selection of photographs for a future photo book can sometimes lead anyone into a stupor. There are so many photos, and the number of spreads is not infinite ... First of all, call on your initial idea to help. For a photo album for the year, you can group photos by month, and select 10 key ones for each month.
By the way, there are special programs for grouping photos by periods (for example, Adebis Photo Sorter). You collect all the photos in one folder and run the program by setting its parameters:
- where to put the sorted files,
- interval for selecting photos (day, week, month),
- folder naming rules.
As a result, you will get a catalog with photos sorted by periods in folders. For everything about everything - 15 minutes of time.
For a photo book about summer holidays, you can mark key events for yourself and, based on them, make a selection of photos.
When choosing photos, listen to your emotions and feelings. If positive emotions and a sense of harmony arise inside you when contemplating a picture, then this photo is significant for you. Listen to yourself.
Copies of books
The photo book can be ordered in several copies - as a gift to relatives and friends. Available in original size or reduced. It is difficult to come up with a better gift for loving grandparents.
Conclusion
Perhaps the most pleasant and joyful moment in the process of creating a photobook is the final one, when you pick up your brainchild. You physically feel your favorite photos, cover material, pages… All this can only be felt. Photos should be tangible and warm us with their warmth and mood.
Creative success to you!
In the window that opens, click New order if you want to create a new book from scratch, or Open order– if you want to make changes to an already created order.
Selecting the type and format of the photobook
In the left part of the window, select the type and format of your photobook. The image of the selected option in finished form on the right will help you with the choice. Here you can also choose the type of cover: photo cover or book cover.

Once you have defined these settings, move on to the next step.
Photo selection
Select the photos you want to insert into your photobook. On the right side of the window, all the photos you have selected will be displayed. In further work with the book, you can also add and remove photos.

When all photos are selected, proceed to the next step.
Choosing a photo layout option
Choose how the photos are arranged per page and the number of pages. Depending on the total number of photos, the program will suggest the optimal number of pages. Here you can also choose the number of photos on one page - for the option with autocomplete. The "Autofill" feature will help you make an album faster if you are using our program for the first time.

Proceed to the next step.
Background selection
Choose a background for your book. The background can be either a solid fill or any of the templates prepared by our designers. Click the dropdown list in the menu Background selection. For your convenience, all templates are grouped by topic: Children, Journey, Wedding, Miscellaneous etc.

With the background selected, click Proceed and wait a bit - the program will distribute your photos in accordance with the selected settings.
Adding texts
Now let your creativity run wild! Double-click on the text field and add a title for your book, select the color and font of the inscription.

Photo editing
Change the size of photos, their placement on the page, the angle of rotation, add new photos and delete unnecessary ones.

For your convenience, the program will issue a warning that the photos are of low quality and it is not recommended to enlarge them without losing print quality. Pay attention to the border safe area- all elements beyond this border will not be visible when printing a book.
Decorating a photobook with clipart
Add pictures from the collection Clipart for decoration, simply by dragging the picture you like onto the page of the book. You can change the size of the picture, its position on the page and the angle of rotation.

All pictures are grouped by topic: Travels, Children, Vintage etc.
Frame selection
Select a photo frame by simply dragging the frame you like onto the photo page.

Mask selection
Select Mask- an effect similar to a frame that allows you to highlight the desired photo and add a "zest" to it or make the desired accent. Black indicates where the image will be displayed, while white indicates the background pattern.

Adding Effects
Add effects by dragging the icon with the effect you like onto the photo. Effects change the selected image's color (for example, to black and white), brightness, and contrast.

Editing while working
Additional options
Additional menu options Format will help you in your work. Here you can resize photos, crop them, or set a photo as a background. Different elements can be aligned relative to each other, centered on the page, placed in the foreground or background, placed in a “mirror”.

Save for later editing
Got creative and want to get back to editing the album tomorrow? Be sure to save what you have.

Placing an order
Is your photo book ready for printing and it's time to place an order? Feel free to press the button Order!
Preview: look again, are all the photos in place?

Select the type of cover: photo cover or book cover; cover finish: glossy or matte lamination, metal corners; number of copies. If necessary, add your comments for us.

Choose how it is convenient for you to send us the file - download via the Internet or bring it on disk. Enter your contact details. Please note that fields marked with a red asterisk are mandatory.

Choose how it is convenient for you to receive the order - order delivery or pick it up yourself at one of our offices. Fill in the data for delivery

Congratulations! Your order has been sent! You can check and print the order form again. And we will call you and inform you about the readiness of your photobook.

Many interesting and unusual household items are sold in stores. But to make a thing with your own hands in order to please yourself and loved ones, while knowing that no one else has such a unique product, is much more pleasant.
Unusual book of memories
Recently, more and more people are trying to create a photo book with their own hands, so that there are bright memories of the irretrievably flowing moments of life. And I no longer want to lay out the photographs in a boring, unremarkable, stereotypical photo album, but I want it to be completely different - elegant and beautifully designed.
In specialized stores, a large number of decor elements are presented to create your own work. But before you buy everything you need, you definitely need to decide which topic will dominate. Or maybe a do-it-yourself photo book will be dedicated to a single event?
This fact is important, because then it is possible to clearly define:
- what materials for binding and decor will be needed;
- what is useful for background decoration;
- how to decide on the choice of texts.
Most often, making a photo book with your own hands is caused by important events, for example, the birth of a child, an anniversary both in personal life and in a work team, a wedding. And even an ordinary country trip can be imprinted forever if a whole book dedicated to a short trip appears.
Number of pages
When the event and theme are determined, you need to pick up all the items that will be needed during work. The number of pages in the photo book must also be determined in advance and take a little more - all of a sudden you have to add photos. Sheet sizes also matter and are selected according to the size of the photographs.
All photographs are selected in advance, the texts for them must also be selected. The most elementary material for the pages of a photobook should be dense sheets. The main thing is to decide how to place the pictures. It will be necessary to experiment, putting a photo on paper. It will take quite a lot of time for this procedure, but then the finished album will turn out at a decent level.

You can attach a photo in various ways:
- The usual method, but the photo will take the entire spread, or you will have to cut the edges. You can give photos an unusual shape using one or more templates for this.
- Frame each picture, decorating each with an exquisite pattern. But the frames will also require certain conditions, since you should decide what thickness should be, what color shades will look most harmonious.
An original do-it-yourself photobook is obtained when a two-page layout is used, on the first half, allocating space for a photograph, and using the second for a witty text or poem. But you can put a lot of photos on the spread - this is how fantasy tells. An important condition: do it in such a way that you don’t get a thoughtless pile of pictures and don’t lose the semantic style. Otherwise, browsing through such a chaotic book will not be easy.
Text additions
Many, when creating such books, do not take into account the texts. They are right in their own way, because usually texts are used if they want to supplement the captured moment with some important information that is understandable to the viewer. You can make a short note, indicating exactly where the photo was taken or who exactly was captured if the person or event is unfamiliar.

But do not emphasize what is clear without words. If you want to make headlines or small texts, be sure to find a place for them to match a specific photo. But they should not be so good that they will attract attention to themselves more than a photo.
Be sure, when creating your own photo book, you should follow the rules of sequence and remember the given topic. Having decided how many sheets will be involved and what size will be needed, you should decide how to design the cover so that it looks attractive and explains what the do-it-yourself photobook is about.
When the basis of an unusual book is ready
The easiest way to get your own original edition is to take the required number of thick sheets (landscape is ideal) and fold each one in half. Using glue, they must be attached in this way: glue the last page of the previous spread to the first part of the next sheet. When the last sheet remains, it should be attached at the top, as this is already the cover. So the basis of the photobook will appear.

Now, page after page, the album is filled with photographs, which must have a clear sequence if we are talking about the development of any event. The layout obtained in this way can be useful if it is possible to make up a book in a graphic editor. To make a do-it-yourself photobook at home more durable, they buy sheets of thick cardboard. If you need to cut them, do not use scissors, but a clerical knife, since it is easier, faster and more convenient for them to cut.
Beautiful design
Photos hold up well when attached with double-sided tape. Glue in this case is a poor helper, because it deforms the pictures. You should not decorate the pages too intensively with voluminous applications or patterns, otherwise the book will not close completely. For easy design of each page, a convenient photo book should be created. With your own hands, templates can be made in any quantity. It is easier to work on such blanks, but the pages should not be overloaded with colorful and numerous drawings.

But the cover provides a lot of room for creativity. It can be decorated with all kinds of ribbons, velvet, small artificial flowers, beads, macrame elements or crocheted all sorts of patterns. The materials from which decoration can be made are very different. You just need to remember that they must fully correspond to the theme of the entire photo book.
Connection of parts
During work, you must not forget from the edge where the album should have a spine, leave a place of about 2 cm, so that the assembly of the photobook with your own hands can be done quite easily in the future. Binding is the most labor-intensive work. It would be easier to give the parts to an experienced craftsman so that he puts the book together, but you can try to complete the work you have begun on your own. It is possible to connect the sheets using springs, but only if they are not as dense as cardboard. Using a hole punch, you can make holes and connect all the pages using satin or silk ribbons.

With the help of rings, you can make a more durable structure. You can do it yourself, which will require a vice and a hole punch. The sheets are brought together and fixed so that they do not move. Only then can holes be punched. So that the resulting holes do not deform and do not deteriorate, eyelets need to be strengthened there. It is not necessary to buy metal rings, they are suitable from plastic. But the braid will also perfectly connect all the cardboard sheets.
You can start your own business
If the self-made photo book turned out well, earned the approval of others, an order may be received from those who want to have their own album. You can eventually make this work the main occupation. People have many reasons to remember important events that happen in their lives, so orders will always be in demand. But in this case, more solid materials will be required, and these include:
- a machine designed for assembling sheets and making covers;
- a machine that rounds corners;
- a device that cuts corners;
- a machine that allows you to attach corners to the cover.

Conclusion
All devices, accessories will require costs, but this business is just emerging, so there will always be customers. The efforts and expenses will pay off and will soon bring profit. So if at first the question was only how to make a photo book with your own hands for your family, then soon this hobby will begin to provide an excellent income.
In our time, it has become very fashionable to have photo books in the home archive instead of ordinary photo albums. On the one hand, it is much more convenient, since you do not need to spend time selecting photos, printing them, and then arranging them. But on the other hand, a photo book is not a cheap pleasure. Given the above, I want to bring to your attention my response to expensive photo publications. I propose to make a photo book with your own hands in a budget version, that is, in a format of 8 cm * 8 cm and with 20 photographs. This mini book in hardcover, I hope, will be a worthy addition to your photo archive.
So, to create it you will need:
1. printed photos (even number);
2. double-sided adhesive tape on a paper basis (or glue "Moment");
3. double-sided adhesive tape on a foam basis;
4. piece of leather (leatherette, fabric);
5. iron corners (optional).
And now everything is in order.
I. We need printed photos. There are two ways to get them in the right size.
First way: select the desired photos and paste them two together in Microsoft Word.
There, set them to the required size on the appropriate tab, if necessary, crop them. 6 photos will fit on an A4 sheet (3 blocks of 2 photos of 8cm * 8cm in size).


After processing all the photographs, we print them on a printer on photo paper.
Second way: you can do everything the same as in the first method using Adobe Photoshop, if you have sufficient skills to work in it.
Photos must be MANDATORY an even number plus two on the cover. Their size will determine the size of the entire photobook. Photo paper should be taken one-sided, better matte with a density of 160-200 mg / cm3. If it is not possible to print on a color printer, you can do it in black and white, especially since it is now in fashion, a kind of retro chic!
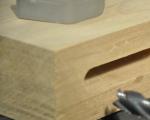
II. Cut out the photos in blocks of two and one for the cover.

It is better to use a clerical knife and a ruler for this, rather than scissors.
III. Now glue all the blocks together except for the cover. To do this, you can use double-sided tape, or you can take glue like "Moment". Personally, I prefer tape, because it is more convenient to work with, does not require special care. However, it costs much more than glue, given its high consumption. In the end, you get such a “book” photoblock.


IV. We make a cover. To do this, cut out of any cardboard two squares in the size of two covers.

Glue the first to the front of the block, and the second to the back.

Now we need to decorate the end of our almost finished photo book. We take a piece of leather (leatherette, fabric) as high as a book, and 2 cm wide more than the width of the end of the book. We glue it in a stretch exactly to the end and with an overlap on the covers.

You should not pull too hard, otherwise the book will open on its own. The gaps on the cover do not need to be more than 5 mm, because. cover will peel off. And now the most important thing - cut out photo covers with glue.

We enjoy our work.

As a kind of exclusive detail, you can make a voluminous cover. To do this, you need to print one copy of the cover (front) more. From it we cut out any details that, in your opinion, are suitable to create the desired effect. I have a camera lens and a tape with an inscription.

We stick on double-sided adhesive tape on a foam basis for a 3D effect. Voila, the photo book is ready!!!
PS: If you are having difficulty working with Microsoft Word - http://microsoft-help.ru/
Thank you for your attention. Successful creation!