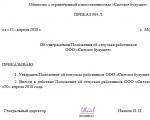
How to make a beautiful turn in the decoupage diary. Decoupage notebook. Do-it-yourself technology for making a gift diary "under the skin"
I post my exclusive, previously published on the website of the online store Hobby.ykt.ru.
MASTER CLASS
"Diary decor in decoupage technique in vintage style"
We will need:
Diary itself, printed on inkjet printer, rice decoupage card
(but not necessarily - it is fashionable to use both napkins and any clippings from magazines),
acrylic putty, spatula, fine sandpaper, varnish
acrylic, black and ivory acrylic paint (for top
background), craquelure varnish, hairdryer, candle.
We have in stock a regular diary with the logo of a certain company
bound in leatherette, A5 format, but I want an exclusive! We don't need a logo
therefore, we level it with the surface using putty and a rubber spatula. Thoroughly
dry, and then sand the alignment site.

While our putty dries, let's prepare the motives,
which we will stick on our diary later, after full readiness
surfaces for decoupage.
We chose 2 types of motifs for decoupage - a printout on
laser printer on thin consumer paper and a rice decoupage card.
We will slightly age the printout, for this we will burn its edges with
using a candle, gently bringing the edges to the flame in small areas. We don't give
paper to flare up - immediately extinguish the sparks with your fingers, observing safety measures!

We get such an uneven aged edge:

Now, with the help of a car spray varnish, we will fix it on it
paint - provided that it is made on an inkjet printer. As is known,
inkjet printer inks "float" when exposed to moisture. Working with varnish
laying a newspaper under the printout and opening the window wider. We cover with two
thin layers and leave to dry.

We simply carefully tear out the motives from the rice card - with
when gluing, the joint of the torn edge with the surface is less noticeable:

The putty has dried and is already sanded to evenness. Let's paint it in tone with the main background black acrylic paint with a piece of sponge
pecking movements:


Let the paint dry well, you can help it with a hairdryer.
Now we prime the entire surface of the diary with acrylic varnish, this is done in order to clog all the pores of the leatherette and improve the adhesion of subsequent layers to it:


You can also use a hair dryer to speed up the drying of the varnish.
The varnish is completely dry, and now - ta-da-da-dammmmm !!! - craquelure!!!
In our case, we use one-step craquelure varnish. We cover the entire surface with it. I did not follow the direction of applying the varnish.

We dry the layer of craquelure varnish again, and you can again use a hairdryer,
the main thing is not to overdry, the finger, when touched, should slightly stick and come off dry and clean (the so-called “drying
off the hook").
Now here's the main thing:
Applying a layer of paint. You can use a piece of sponge
You can do this with a soft wide brush. The main condition is well moistened
paint tool (but so that the paint does not flow from it!), the paint is not liquid and does not
thick, and applying a layer of paint IN ONE PASS - i.e. 2 times to the same place
you can’t touch it with a brush or sponge - the craquelure layer immediately gets wet and
smeared, cracks will not work, but a daub will come out! In general, I personally like to do
craquelure with a sponge - it is easier to apply strokes, the joints between them are not so visible, but this time I changed myself and took a brush! Then I tinted the flaws between the strokes (when everything was already dry). So, we started - we put strokes as we like, but parallel or perpendicular each other,
We try to make them the same length. We wet the brush with paint as needed - this is somewhere in 3-5 strokes.

Now our creation is already drying up and begins to “tear” due to
Differences in the drying time of layers of varnish and paint - cracks appear!

You can help the appearance of cracks with a hairdryer, and after completely covering the diary, also dry it dry with a hairdryer, and then protect it with a layer of acrylic varnish - this is so that our craquelure does not suffer during subsequent work with PVA glue and motifs!
We glue the motifs on PVA glue, diluted in a ratio of 1: 1. We lubricate the motives themselves with them, let them lie down a little, get wet, and at this time we lubricate the surface of the product.
We apply motives and press firmly, smooth out all the wrinkles, expel
bubbles. You can roll them for reliability with a rubber roller.

Saturate the excess glue on the surface with a napkin, let it dry again.
And finally - we cover our work with acrylic varnish,
do it at least 3 layers with intermediate drying.


Everything, our diary is ready! You will definitely not see another one like it!
I think you liked my master class and carried you even deeper
in decoupage wilds! Good luck!
A working diary is a prosaic thing, perhaps necessary for every adult. However, even it can be decorated with your own hands, turning it into an exclusive accessory.
Our article will tell you about two options for decoupage of the diary: “under the skin” and in a romantic style.
DIY gift diary "under the skin"
You will need the following tools and materials:
- diary
- Egg shell and PVA glue
- Acrylic paints
- Decoupage napkins
- brushes
Do-it-yourself technology for making a gift diary "under the skin"
Crack open the eggshell.Spread one side of the diary with PVA glue, evenly distribute the shell fragments. Repeat with the other side of the diary.

Let the diary dry, cover it with white paint.

Decoupage the diary with your favorite napkin. Attach it to the surface and cover with PVA glue.

If necessary, paint some ornaments with acrylic paints.
Let the gift diary dry, varnish it.
Decoupage of a working diary in a romantic style
To decoupage such a diary with your own hands, you will need:- diary
- Primer
- Napkin for decoupage
- PVA glue
- Fine sandpaper
Do-it-yourself decoupage of a working diary
Cover the diary with a primer. Let dry and then sand.Decoupage the diary: attach a napkin and gently coat with PVA glue. If you need a napkin to spread in some places, the missing “details” can then be finished with acrylic paints.

Let the diary dry, then sand it again.
Cover the gift diary with varnish and dry.
A diary, decorated with your own hands, will be a wonderful gift for both a woman and a man, which is especially important in the light of the upcoming holidays. This unusual and opulent accessory is able to bring a little variety even to the most gray everyday life!
If we ask connoisseurs of beauty what style is, many of them will answer: "Style lies in the details." It is such little things as a pen, a watch, a diary and a wallet that make the image spectacular and unique.
Today we will analyze how to decorate a diary (notebook) in decoupage style. Decoupage is not just a technique in which objects are decorated by attaching drawings and fragments of paintings. This is real art.
To make a stylish thing, we need the following materials:
- diary or notebook;
- napkins for decoupage (can be ordinary, with a beautiful pattern);
- white acrylic matte paint;
- decoupage glue (you can also use PVA glue);
- glossy acrylic lacquer;
- scissors;
- tweezers;
- brushes No. 1, No. 7, No. 8, No. 30.

Stages of work:
1. First, let's prepare everything necessary materials to have everything at hand. And we proceed to a very exciting and creative activity, with the help of which we will get a designer thing out of an ordinary diary. Using brush No. 30, cover the blank (diary) with white acrylic paint (you can use any color paint, depending on the result you want). Let's wait until it dries. This will take approximately 25-30 minutes.

2. In the meantime, we will prepare the selected napkin for work. To do this, take a napkin and divide it into layers. As a rule, there are 2-3 of them.


3. Then we carefully cut out the desired or liked fragment of the picture, in our case, these are flowers and butterflies.

4. With the help of tweezers, we apply the cut-out fragments to our workpiece and with brush No. 8 we apply glue on top of the napkin. For gluing small parts, it is better to use a brush number 1. We do not pull the napkin, but apply glue with tapping movements so as not to tear it. Glue should be soaked through a napkin. We are waiting for complete drying, about 40 minutes. If some details crawled out of the cover, then carefully cut them with scissors.


Master class: decoupage diary ====================== Irina Gerun "Decoupage - decor" =============== ==================== I really like decorating diaries. I am constantly learning and improving myself. I take into account the advice of the masters, work on the mistakes, learn something new. Today I want to show and tell how I decorate the cover of diaries: what materials I use, what and how I do it. Maybe my advice and experience will be useful to someone. So, we need: ready diaries; acrylic primer "Tair"; acrylic elastic varnish; putty, spatula or palette knife; sandpaper; synthetic brushes; PVA glue; putty; cosmetic sponge; masking tape; file; glue "Titan"; metallic corners; silver outline; silver acrylic paint; prints on photo paper; satin narrow ribbons; inspiration and good mood. I bought these diaries. Their surface is very convenient for decoration. I decorate without taking apart the diary itself. But you can complicate your work, and separate the cover from the block and decorate separately. But this will be another master class :) Advice for beginners: if you have never done decoupage of the cover of a diary or notebook, then try to do one. For those who are already decorating covers, I recommend doing two or three at the same time. Next, we think over the decor of the cover. Personally, I like to make collages in Photoshop or edit pictures, I select by size. I print on an inkjet printer in an ordinary photo center of the city. On ordinary cheap photographic paper (Lomond is not loved by everyone :) What kind of paper is in the photo center - I can’t say. But it loosens well. Be sure to think about how to arrange the flyleaf of diaries. I myself edit the picture in Photoshop and print it out on office paper. Remember that for endpapers you need to print in duplicate :) You can take scrap paper or plain colored paper. m sheets of a diary. I dress the file and secure it with masking tape. You can wrap them in cling film. Do not forget about the place near the spine :) Next, you need to degrease the cover (vodka or alcohol will do). And primed with acrylic primer. I have Tahir. I apply it first with a brush and then spread it with a roller. The soil is dry. Now we will strengthen the spine and the fold. To do this, you can take a thin layer of a napkin, measure the size, cut a strip. We glue this strip with PVA glue joiner. Must dry well! Now you need to paint over everything with white acrylic paint. But it is advisable not to paint the fold. The fewer layers of paint on it, the better :) Then we will immediately paint it in the desired color. Let dry and then sand to a smooth surface. While we have something to dry, we prepare our printouts. To do this, I took the VGT glossy and elastic varnish. Personally, I really like this polish. And great for spreading! If you do not have this particular varnish, then take any varnish to work with diaries, but the main thing is that it be ELASTIC! Since it is not subject to cracking. In addition to printing on photographic paper, you can also take a decoupage or rice card, or implant a picture using the "muzzle into varnish" method, or use a napkin - here you can choose the method that is convenient for you. So, I covered the photographic paper with four perpendicular coats of varnish with the intermediate drying of each layer. We cover carefully, try not to go on the inside of the paper. Now we cut the pictures along the contour and soak them in warm water. To make them exfoliate easily, you need to keep them in the water longer. They can swim like this for an hour or two. Nothing will happen to them :) I put the printout face down on the file, pry up a thin layer in the corner with a needle or fingernail and gently pull this film along with the file. Everything falls apart very easily! The main thing to remember - do not glue anything to the place of the fold! Another point that beginners are afraid of. After getting wet and gluing, the film becomes whitish, cloudy. You don't have to be afraid of it. When it dries, it will become bright! How to stick a printout on reverse side covers without damaging the already glued side and not waiting for complete drying? You can carefully turn it over, but put the file down, but this is a risk :) I put the diary on the edge of the table, while hanging down the already sealed part of the cover. Like this: Now you can conveniently stick on the back side. When decorating diaries, I often use putty. In this case, I again have VGT, it has been checked more than once, it does not crumble. does not crack, has shown itself well in work. You can also take structural paste. Through the stencil, we apply a pattern of stones on the back of the cover. Is there such a stencil? Stones can be drawn on putty with a toothpick. We also dry everything on the edge of the table. It is important to let it dry well naturally. I leave overnight. During this time, the film from photographic paper, as it were, stretches, smoothes, becomes strong and bright. After drying, be sure to thoroughly sand the pebbles from the putty. We brush off the dust from the putty into the sink with a brush (there is a lot of dust). And now we will cover everything with varnish. 1-2 layers. We protect our pictures with varnish. It's time for painting. And, if we don't like something, we can easily erase it without damaging the pictures. We mix the colors of the desired shades. Coloring the spine. Inside, we will also paint the edging. Let's paint our stones. Remember! Place the fold, cover with elastic varnish no more than 5 layers during the entire work! The fewer layers there are, the less risk of cracking in this place. What else can you decorate the covers with? You can take a modeling transparent Tair gel, silver or gold acrylic paint, stencils, a palette knife or a disposable knife. Mix the gel with silver paint and apply through the stencil to the spine. I use a disposable knife. You can also make the covers themselves. This is where your imagination comes into play! Important! The gel dries quickly and the stencil must be washed immediately. Warm water with soap. And I throw away the knife :) For this work, we will mix the gel with gold paint. The gel dries completely in 12 hours! No clear gel? It can be replaced with putty or structural paste. Varnished and well-dried covers need to be sanded a little with fine sandpaper. For example, in this picture there are lilac leaves, you can add this shade to the background of the back cover using the dry brush method. We collect paint on a bristle brush, wipe it on a napkin. And, as it were, we “comb” our surface with it. Instead of a dry brush, you can use a spray. Take lilac paint, dilute it a little with water, soak an old toothbrush and run your finger over it, pointing it at the cover. The back cover of the Leopard diary is missing some greenery. Let's use the drawing method. Let's draw a tree branch that seems to be hanging from a cliff. With a thin brush, draw the branch itself. For foliage, we need an old disheveled brush. We collect paint of the desired shade on the brush, apply it with pokes along the branch. We wipe the brush with a napkin. We take a different shade and again poking. And so several shades of paint from light to dark. This will add volume to the greenery. Here's what happened. Now let's color the stones. We add several shades from light to dark, giving volume. We varnish the work with several layers of varnish with intermediate drying of each. In this case, the varnish must be taken glossy, it gives the depth of the picture, brightness. And for finishing varnishing, you can take matte. Remember the place of the fold, there are no more than 5 layers! But for the rest of the work, you can use as many layers as you like :) At the end, we grind the work with fine sandpaper on wet. This gruel, as it were, will smooth out all the bumps and polish the surface. The cover will be very smooth and pleasant to the touch. Then you can also sand with metal wool or I still use a rough layer from a sponge for washing dishes. Remove the protective film from the pages. Let's do some toning. It is necessary to choose a flat brush in width suitable for the size of the block. I grip the block of pages tightly with my fingers and QUICKLY run the paintbrush over them. And so from all sides. For bookmarks, take a satin thin ribbon of a suitable color. Let's measure the double length and still a margin for tying up the pendant. I glue TITAN on glue (it does not corrode, dries quickly, is transparent, and is washed off fingers better than Moment). But you can take Moment Crystal. I glue the bookmark along the entire length on the back side of the cover, closer to the fold. Now let's do the design of the endpapers. Cut out the prepared paper to size. I use the same TITAN glue. But DO NOT TAKE PVA at this stage! It dries longer, soaks the paper, it can be deformed. Between the endpaper and the rest of the sheets of the block, put a sheet to protect them from glue. Apply glue to the cover and paper. And quickly smear it with a piece of paper (not fingers). Carefully glue the picture (glue dries quickly). We iron with a napkin so that there are no wrinkles. And the same on the reverse side. And now it's time to decorate our diaries. I didn't have silver fittings. I had to paint. Degrease with alcohol first. Then cover with silver acrylic paint. And then varnish. Using a toothpick, glue the accessories. we fix a metal pendant on a ribbon, burn the edge of the ribbon, fix it with titanium glue. Decorating the cover is the most interesting stage! Here you can apply rhinestones, a silver outline. But the green color goes well with gold. Therefore, the edges of this diary can be highlighted with baguette paste. On the inside, I often splatter the pages to match the base color. To do this, I use special felt-tip pens for children's creativity- Blops. The cap is rearranged in them, and you need to direct the tip and blow into it, and you get such splashes. Important! They can only be used to decorate PAPER, as they are water. We wrap the diary in a file so that nothing sticks. And under a good press for the night. Hurray we get them and admire the work! Many thanks to everyone who read to the end! I would be glad if my advice on decorating diaries is useful to someone. If you still know what secrets for decorating them, let's share them with each other in the comments :) I wish you all inspiration and success in your work!
From this master class you will learn how to turn an ordinary diary into a work of art. It will decorate your desktop or be a wonderful gift for friends or colleagues.
Initially, I had such a boring diary. What I needed for work: a napkin with a motif I liked, glue, paints, finishing varnish and varnishes for craquelure.

The surface of the diary was quite smooth, so I took a thin skin (I have it in the form of a bar) and lightly sanded both sides. In principle, it was possible not to do this.

Then I degreased the surface with regular nail polish remover. This can be done with alcohol or, if you decoupage ceramics or glass, you can do with dishwashing liquid. The surface of the diary began to rapidly lose color and become covered with waves. But it won't bother us.

Next, using a sponge on a stick, prime the surface with white acrylic paint. The primer improves the adhesion of the future image to the base and makes the image brighter. For this step, you can use a special sponge sold in craft stores, but you can just as well take a piece of a regular dishwashing sponge and secure it with a clothespin.
Depending on the quality of the paint, 1-2 layers of primer are applied. Next, let the paint dry. Drying time is highly dependent on the material of the surface to be primed. But the tree dries out literally in 15 minutes, on the skin it dries much longer.

Next, we tear out the motive we need from the napkin. If you do "edge to edge", you can cut it out, but if not, then after gluing a step will form on the surface, which will then be very difficult to hide. I decided to use the napkin completely, I really liked the background! But it was possible to tear out only a flower, and finish the background by yourself.

We are waiting for the glue to dry completely and see what happens.

There are some small creases and the fabric is slightly torn in places. But it's okay. Let's sketch. And I also don't like the color of the edge, it's kind of faded. Therefore, we take a piece of sponge and my beloved Decola metallic paint, apply a little paint on a dry sponge and “bang” where the soul requires.

We cover with several layers of acrylic varnish, each drying well and the diary is ready.
But this seemed to me not enough. And I decided to add a slight touch of antiquity in the form of large craquelure cracks. For this I used Maimeri's Idea No. 753 varnishes + gum arabic (two-step craquelure).
We wrap the paper block of the diary in polyethylene so as not to stain the pages with varnishes. With a flat brush we smear No. 753 (these are the last numbers of the varnish article), trying to move in one direction and not too much over the same place.

This varnish is very sticky, we try not to cover our hands. I wash my brushes right away, and ordinary water will not help here - you need a product with the inscription "anti-fat", for example, we wash the stove like this.
We are waiting for the varnish to become a little more transparent. Manufacturers recommend waiting until it becomes completely transparent, I don’t wait that long.

Here he brightened up. We cover the table with something and pour a puddle of gum arabic on the surface. The larger the puddle, the larger the cracks and the longer it will take to rub it in. I poured this puddle:

And then gently, without strong pressure, in a circular motion, rub the gum arabic with your fingers over the entire surface. We rub until the varnish begins to "cling" a little and when touched, fingerprints begin to remain. This whole procedure is carried out by hand because, in theory, these 2 varnishes should not be mixed. But we are cunning and enterprising people, but we want large cracks.
As soon as this moment has come, we leave our work alone and wait with bated breath for the appearance of cracks.
It is worth noting that you can never predict the result in advance, craquelure is very capricious, does not like drafts, temperature changes and humidity, depends on the thickness of 1 step and 2 steps, so only with experience you will pick up optimal conditions. Do not let things take their course, do not go far from work, constantly check "to the light" for cracks. And even more so, do not leave the process overnight, the varnishes are very mobile, first large cracks will appear, then they will begin to get smaller, and so on up to a grid of cracks of 2 x 2 mm.

We take a dry pigment and rub the resulting cracks with a finger. This can also be done with dry pastel crayons, after crumbling them, or even eye shadow.

I used Pearl Ex 659 pigment:

If we look closer, here's what we see:

You can wait some more time and wipe the new cracks that appear. If you are satisfied with the result, then we carry our beauty to wash off the tap. With a wet hand, gently wash off all the pigment along with the first craquelure step, without pressing on the surface, so as not to damage our cracks. Rinse off until the slippery feeling from the gum arabic is gone. We give the surface to dry and cover with three or four layers of acrylic varnish, drying each layer well. It is worth noting that new cracks will appear until you cover the surface with varnish, so you should not delay this.
Everything, the work is ready!