Master class. Painting boxes with floral patterns. Master class: Paint a wooden box with acrylic paints
Every woman and girl has a personal box in which she stores jewelry, cosmetics or other things. You can buy a box in a store or create a unique item with your own hands. It's not that difficult to do. The main thing is to choose the most suitable decoration method.

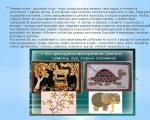
Casket self made made in classic style

Shabby chic style is gaining more and more popularity every year
You can decorate the boxes with anything. Buttons, paper flowers, beautiful napkins, lace fabric, clay, beads, beads, colored glass, coins and so on are useful for decoration. The uniqueness of the decoration is limited only by the imagination of the master. Of course, the set of tools and materials will largely depend on the decoration technique.
In most cases, boxes are made of wood. To get a well-executed creation, special attention will need to be paid initial stage preparation:

Light nature motifs on a box in Provence style

Stylish box made from scrap materials
The most popular technique is decoupage, known to craftsmen for several centuries. Napkins are useful for decoration, beautiful pictures, pieces of fabric. Both a professional and a novice craftsman can decorate a box using the decoupage technique.
You can create a relief cover for the box with your own hands. In this case, the following will come in handy: relief paste or modeling gels, stones, shells, beads and other three-dimensional elements.
If you have at least minimal artistic skills, then the box can be painted. There are many styles: Khokhloma, Gzhel, Gorodets painting. You can depict your own unique composition.

Mohair fabric inside the box

Chic vintage box created using decoupage technique

This box will perfectly complement the interior
Decoupage
For work you will need the following materials:
- napkins, magazine clippings or scraps of fabric;
- PVA glue;
- acrylic paint;
- brushes;
- scissors;
- sandpaper.
At the first stage, the box is prepared for decoration. The surface must be perfectly smooth, since subsequently all defects may become more noticeable. When the product is prepared and dried, you can start decorating:
- Cut out and try on elements of the composition from napkins or fabric.
- Place the cutout on the surface and carefully apply glue, smoothing the paper from the center to the edges. If fabric is used in the decoupage technique, then glue will not work; it is better to take a stapler and attach the fabric to internal coatings caskets.
- Dry the product.
- Apply varnish (if using fabric, this step is not necessary).
Using the decoupage technique, the box can be decorated both outside and inside.
Advice! You can use various photographs for decoupage. But first it is better to remove the bottom layer so that the paper is thinner.

Stylish vintage never goes out of style

A box with mohair fabric will be both practical and an excellent interior decor
Vinyl wallpaper
You can use leftover vinyl wallpaper to decorate the boxes. Thanks to simple actions You can make a unique item with a metal coating. For this you will need:
- wallpaper;
- PVA glue;
- towel (preferably disposable paper ones);
- acrylic paints of several colors (black, bronze, scarlet, silver, green, gold);
You can decorate the entire box or certain elements. To complete the work, take the following steps:
- Cut out pieces from the wallpaper, taking into account allowances for the edges.
- To cover the surface with an even layer of glue, apply it to the back of the paper. The glue can be diluted slightly with water. The base should be very well saturated with the resulting solution.
- The paper needs to lie down for a while, and then it is pressed tightly against the box with a sponge.
Important! It is imperative to ensure that no bubbles appear.

This handmade box will be an extraordinary gift for family and friends.

Classic box in vintage style

Vintage box made using craquelure technique
After the described steps, the product should dry and then really give the box the appearance of metal.
Attention! The paint is applied using damp towels; it should lie unevenly.
- Initially, black acrylic paint is applied as a base. You can use a dark color in a spray can.
- Using towels, the box is covered in red and dried.
- The next layer is silver, and then bronze.
- After this (in small quantities!) black and red colors are repeated
- Now carefully, using a damp towel, cover the entire box with green color.
- The last layer is gold.
After the box has dried, it is coated with varnish.

Exquisite box decorated using decoupage and craquelure techniques

Box in Provence style, made in different colors
painting
To paint a product you do not need to have the talent of an artist. In addition, stencils can be used to decorate the box. You can choose absolutely any image, it all depends on your imagination and preferences. To work you will need:
- casket or box;
- primer;
- acrylic paints;
- brushes;
- stencil (you can make it yourself or buy it at a specialty store);
- masking tape;
- sandpaper.
Advice! It is better to pre-treat the box with sandpaper and varnish it.

One of the features of the shabby chic style is floral motifs.

Standard mustard-colored box with ribbons - simple and beautiful

Stylish scale made using decoupage technique
The work includes several stages:
- Primer coating.
- Sanding.
- Tape the bottom corners with tape.
- Coating the product with light acrylic paint.
Important! Acrylic is applied evenly.
- After drying, the surface is treated with sandpaper and a layer of paint is applied a tone darker. This layer should be liquid so that you can then blot it with a sponge, giving the surface texture.
- Secure the base with varnish.
- Use masking tape to cover the parts of the box that will not be decorated.
- The selected stencil is fixed.
- The drawing is carefully painted over. The paint should be thick and water should be used in minimal quantities.
It is possible that after drying the drawing will have to be repainted, since the color will most likely be pale the first time. If the stencil is a small element of the composition, then the action will have to be repeated several times. After the painting has dried, the box is coated with varnish.
This master class allows you to create a product whose surface looks like fabric. This is achieved due to the fact that between the main layers the box is varnished, and the paint does not saturate the wood.

The box decorated with beads and leaves looks very beautiful

This type of box decor will be an excellent addition to the interior or an original gift.
Volumetric decor
The next master class is dedicated to creating three-dimensional decor with your own hands. The decoupage technique will be used here again. To work you will need:
- casket;
- printout of the drawing in two copies (on glossy and matte photo paper);
- acrylic paints (it is better to choose glossy ones);
- putty;
- palette knife;
- sandpaper;
- acrylic paints of different colors;
- brushes of different numbers (No. 1 is a must!);
- felt with adhesive backing;
- lace, ribbons;
- thick glue;
- scissors;
- primer;
- masking tape;
- transparent, quick-drying and reliable glue (you can use “Moment”).
The surface is pre-prepared using sandpaper. At this stage, it is worth considering that the paint will give a certain thickness to the walls and the lid may not close tightly. Therefore, it is necessary to sand the wood especially carefully at the joints. After this, the surface is primed.

Shabby chic style combines large number details

Decorating a box with beads will make it brighter and more presentable.

Box in Provence style, made in blue
Registration is carried out in several stages:

Advice! If folds cannot be avoided, then you can move them to different leaves or flower petals, and then “hide” them behind the drawing.
- The dried surface is secured with varnish.
- To create volume, putty or structural paste is applied to certain elements of the design. The layer should not exceed three millimeters. Leave an indent from the edge.
- Convexities are treated with sandpaper.
- From the second drawing, images are cut out along the contour, which should be three-dimensional and glued to the lid.
- After drying, the contours are drawn acrylic paints.
- The remaining parts of the product are decorated and varnished.
Thanks to the master class, you can easily make an original box with a three-dimensional pattern with your own hands.
Video: DIY box decor
The master class on painting jewelry boxes will tell you in detail about the sequence of steps when creating a complex flower arrangement with your own hands. The lesson is intended for beginners, but experienced craftsmen will probably find something interesting in it.
Materials used:
- wooden blank of a round box with a diameter of 90 mm and a height of 50 mm;
- acrylic paints from the “Moscow Palette” set (scarlet, kraplak, dark green, yellow, dark ocher);
- acrylic black and red "Aqua-color";
- PF varnish.
Mixed technique: a combination of stylized painting, close to Zhostovo, with the use of classical one-stroke technology.
We define the task and prepare the material
The painting should be “dense”, filling the empty spaces of the background. We will paint a polychrome floral motif, from dark to light, by successive overlay of strokes, sometimes translucent. It is important that the stroke is light and forms the volume of decorative elements in one pass.
Before painting, you need to make sure that the lid fits onto the body freely and even dangles slightly.

We coat the workpiece, well sanded with fine sandpaper, on the outside with black and on the inside with red acrylic paint.


After the acrylic has dried, we try to close the box.
The acrylic with which we will paint the internal surfaces of the product, although it is diluted with water, does not penetrate into the wood fibers, but forms an elastic film on the surface. In this regard, the lid will most likely not close after painting. This is good because now we know exactly how much wood will have to be removed from its edges.
If the lid does not close, feel free to sand along the entire outer edge of the lid until it dangles freely again. When processing, take into account that the inside of the jewelry box will be covered with a layer of varnish.
The painted workpiece must be allowed to settle. Preferably several days until the acrylic stops sticking.
Painting the box

Immediately before painting, you need to mark the main masses of the ornament. It is enough to mark the largest elements. Markings are made with a soft pencil (a hard pencil will scratch the paint coating).
We begin painting the box by marking the rose petals with red acrylic with a wide wavy stroke of a flat brush, and on one edge we take a little more paint.

We gradually go deeper into the corolla, painting part of the second row of red petals.

Master class: “Painting a box”
Master class on drawing using Gorodets painting motifs
Information about the author: Yakushenko Zinaida Alekseevna, teacher additional education Municipal budget educational institution additional education for children at home children's creativity Karasuksky district, Novosibirsk region.
Audience: for 5th grade students.
Purpose: master class on drawing.
Target: decorate the box using Gorodets painting motifs.
Tasks:
1. Familiarization with various elements of Gorodets painting.
2. Application of elements in practice.
3. Instilling a love for folk art.
Required tools and materials:


- PVA glue;
- acrylic paints;
- brushes No. 1, No. 4 squirrel round and flat synthetic No. 9;
- a jar of water;
- napkin;
- palette for mixing paints;
- wooden box blank;
- finished sketch of the drawing;

- sandpaper No. 1 or No. 0;
- tracing paper;
- a simple pencil;
Empty pen refill;
- acrylic varnish;
- oilcloth.
Progress of the master class
Getting started with wooden surface, you should already have an idea of what exactly and in what style and technique will be depicted on it. After all, it depends on how to prime the surface: whether the background will remain natural wood, tinted, or will be completely covered by color.
1.
Before painting, a wooden blank measuring 5x9cm. should be lightly sanded with fine-grained sandpaper and wiped with a dry, clean cloth.
2.
Carefully paint the workpiece with PVA glue with a flat brush so that there are no lumps or sagging. This will be the first layer - primer. Then you need to repeat the operation so that the surface is even in quality and color. To preserve the natural appearance of the wood, it can be treated with transparent primers before painting. Apply the primer at intervals of 1-2 hours, dry at a temperature of 18-23ºC. The primer is applied so that the color does not “fail.”
3.
We apply the tint – yellow acrylic paint, using a flat brush. Dry well.

4. While doing the work, you need to turn the object you are painting in all directions to make it convenient to paint.

5. We create a frame. Gorodets frames are very elegant and multi-layered. Let's create a double frame. Along the top edge along the entire perimeter of the box we will draw a wide strip of brown color.

The next step is to draw an “arc” element along the brown stripe with a thin brush No. 1, also along the entire perimeter. To write it, slowly move the brush, with the tip on the surface to be painted, towards you, gradually turning it in. Then, helping to rotate the brush and moving it almost in a circle, complete the stroke, gradually lifting the brush from the surface.

Next stage– animation: draw a smaller “arc” with white paint inside each “arc” element, and draw a “droplet” stroke between the “arcs”. To create a “droplet” stroke, you need to place the tip of the brush on the surface, and then, moving the brush toward you, smoothly press it to the plane. Having completed the stroke of the required length, stop the brush and easily remove it from the surface.

Next to this frame we will draw another thin frame in which a wave and a straight line of orange color alternate.

6. Using tracing paper we transfer the main elements of the drawing.

7. We make underpaintings of the main elements of the drawing. First the body of the bird. Drawing Gorodets birds is a real pleasure. Because the universal traditional scheme allows you to turn one essentially underpainting into a completely different birds.

We carry out underpainting of flowers, leaves and buds.
To make a circle - underpainting, take a brush near the handle itself with three fingers and pick up paint. Place the handle perpendicular to the plane of the surface to be painted, resting your entire hand on your little finger or left hand.

Circle - underpainting is done by rotating the brush in your fingers. To do this, place the brush with the paint on it on the surface, slightly pressing it against it. Slowly turning the brush around its axis, roll it clockwise between your fingers. Depending on how much you press the brush to the plane of the surface to be painted, a different size of the circle will be written - the underpainting.
We draw “grass” in the free spaces. To make a “grass” stroke, place the tip of the brush on the surface and slowly move the brush towards you, gradually pressing it towards the plane. When finishing writing an element, move the brush in the direction where the stroke should go, gradually lift the brush from the plane.

To write the “leaf” element, draw the left and right parts of it with the “grass” element. If there is a gap between them. Write it down with the same paint.

8. Now you can start “revitalizing” it with black and white paints. Using black paint we draw the main elements of the bird, bush and leaves. Using white paint, first draw decorations for the feathers, wings and tail. We use various elements: “droplets”, “curls”, “dots”, “brackets”.

9. Next we do the shading for the flowers. Let's start with the kupavka - the main flower. Please note that when performing this operation, you must write the topmost and bottom element of the shadow in order for the element to be symmetrical in the future. To the finished painting, draw a central rounded petal at the bottom, and behind it, arrange smaller petals in a circle upward - you can have a curly shape right up to the very core, which occupies the center of the upper part of the flower. After creating the silhouette, make it come to life.

Use the same principle to decorate the remaining buds and leaves.

10. Let's add a few curls and spirals for beauty.

11. Apply varnish to the drawing using a flat brush. To process products at home, it is better to use acrylic varnishes and liquid wax. It is better to cover large flat surfaces with a wide flat brush using quick movements in the shortest possible sections. First, brush along the ends, and then along the main surface. Special attention pay attention to the ends so that the varnish does not flow onto them.

When working with varnish, lay down a clean piece of oilcloth: if the product suddenly falls from your hands, it will not stick to the tablecloth or newspaper and will suffer almost no damage. Place the varnish on the right, place the rag on the left, and leave the space under the work empty.
Recommendations for working with varnish:
- the varnish will lie unevenly if the surface was poorly coated with primer or poorly painted; whoever saves time on priming loses it on the “painting”;
- the first layer of varnish is considered a primer; for a good varnish coating, 2-3 layers are required;
- each layer needs to be dried twice as long as is usually indicated in the instructions, since the seemingly non-stick varnish inside can remain “alive”, which is clearly shown by the “nail test”;
- The varnish should be applied in a thin layer. The rule “it’s better forty times once than once forty times” works here;
- before the next coating, the previous layer of well-dried varnish is rubbed down with fine-grained sandpaper. If abrasions remain on the sandpaper, it means the varnish has not dried;
- you need to work with varnish only in daylight and clean;
- You need to work in a ventilated area.
Our work is complete. We remove workplace and admire our craft. You now have a gift option for any occasion.